The WordPress Customizer allows you to change over 500 website settings, such as the appearance, fonts, homepage layout, beat player, and more.
Each Customizer feature is broken down in more detail below this video.
Go through each panel in the Customizer and the documentation below to find out what’s possible.
How to Use the WordPress Customizer
This video covers how to edit the homepage, but you will get a general idea of how to use the Customizer.
How to Use the WordPress Customizer
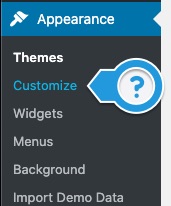
- In WordPress, click Customize on the sidebar under Appearance.
- You can also click Customize when browsing your website.
- Make changes.
- Click the Publish button to make any changes live.
Customizer Panel Overview
- Header – Edit your site’s title, logo, social icons, navigation location, header image, and colors.
- Frontpage Template – Edit the settings for the Frontpage Section Template
- Beat Store Settings – General Settings, Custom Text, Single Beat Page, and Playlist Colors.
- Colors & Fonts – Customize the colors & fonts of your website.
- Background Image – Upload a background image or select a background pattern.
- Pages & Blog – Edit settings for static pages and blog.
- Menus – Customize the header and footer navigation menu.
- General – Edit general settings for tracking analytics, photo, and video gallery templates.
- Product Store – Product store settings.
- Widgets – Add and edit widgets.
- Footer – Footer and footer widget settings.
- Homepage Settings – Update homepage settings to a static page or blog.
- Custom CSS – Add custom CSS code.
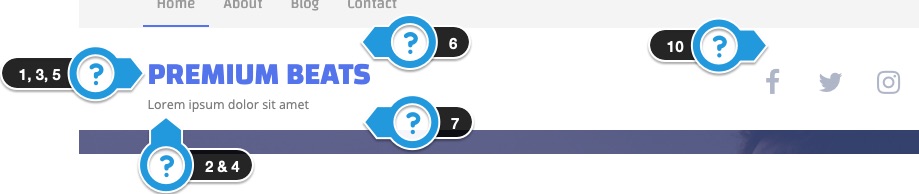
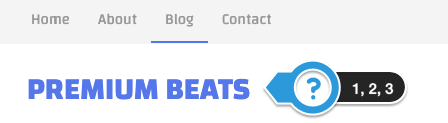
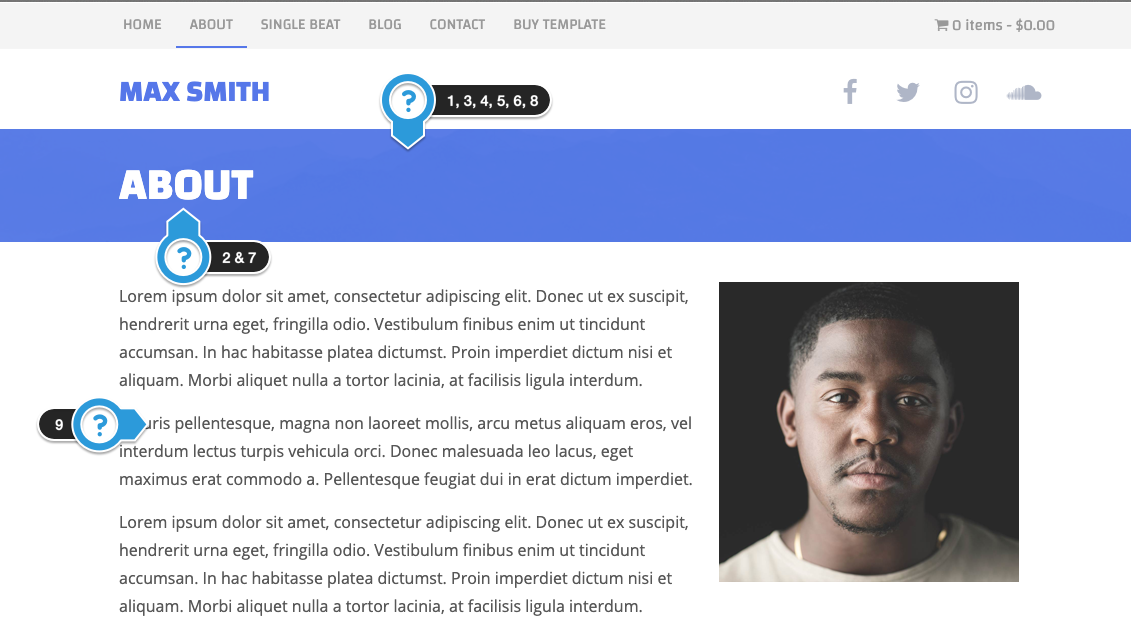
1. Header
1.1 Site Name
- Site Title – Website’s name in the header.
- Tagline – Subtext that appears under the site title.
- Site Title Color – Customize the site title color.
- Tagline Color – Customize the tagline color.
- Site Title Font Size (px) – If you increase the Site Title font size, it is suggested to leave the tagline empty.
- Top Padding (px) – Adjust the padding above your site title to vertically center with the social icons.
- Bottom Padding (px) – Adjust the padding below the title or logo.
- Custom Logo Image – Suggested size is 60 px high, and up to 560 pixels wide.
- Logo Height (px) – Set the height for the logo image. No height is set by default.
- Social Icons Top Padding (px) – Adjust the padding above the social icons to match the site title or logo.
- Title or Logo Position ( Left / Center ) – Selecting the center will hide the header social icons.
1.2 Social Icons
Add links to your social profiles. Icons only appear if the Logo Position “Left” is selected, and they are hidden on mobile. You are limited to 5 icons.
- Social Icons Color
- Options – Facebook, X (Twitter), Instagram, SoundCloud, YouTube, Vimeo, RSS, Tumblr, Linkedin, Pinterest, Flickr, Apple, Spotify, TikTok, Bandcamp.
1.3 Header Background
- Header Background Color – Select the header background color.
- Header Background Image – This will overwrite the header background colors.
- Image Settings – Header background image settings. Options: Default, Repeat, and Stretch.
- Remove Header BG Color – Makes the header background transparent.

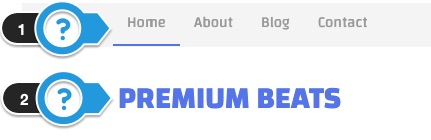
1.4 Menu Settings
To rearrange the menu links, visit the Menus Panel.

- Navigation Link Color – Specifies the color of the links in the navigation menu.
- Navigation Hover Link Color – Hover Link Color: Sets the color the navigation links change to when a mouse cursor hovers over them.
- Navigation Background Color – Determines the background color of the navigation menu area.
- Menu Location – Top / Bottom / Hide: This option chooses the location of the navigation menu, either at the top or bottom of the header or hides it completely.
- Enable Sticky Menu – Appears when scrolling down past 500px: When enabled, the navigation menu sticks to the top of the page after scrolling down 500 pixels.
- Display Search in Menu – This input will search the blog, not beats. Adds a search bar to the navigation menu that searches blog posts.
1.5 Promo Bar
The promo bar is a notification bar that appears on the top of your website to grab some extra attention on your site.

- Show Promo Bar – This setting allows you to display or hide the promo bar on your website.
- Promo Bar Text – Enter the text you want to display in the promo bar. This text should be concise and attention-grabbing.
- Text Color – Choose the color of the text that appears in the promo bar to ensure it is readable against the background color.
- Background Color – Select the background color of the promo bar. A contrasting color to the text can help the promo bar stand out.
- Button Text – Enter the text for the button that will appear in the promo bar. This should be a call to action, such as “Shop Now” or “Learn More.”
- Button Web Address – Specify the URL to which the button in the promo bar will link. This allows you to direct visitors to a specific page on your site or an external website.
1.6 Site Fav Icon
- Site Icon – The site icons appear at the top of the web browser. Site Icons should be square and at least 512 × 512 pixels.
2. Frontpage Template ( 20 Sections )
2.1 – Frontpage Settings
These settings only apply to the Frontpage Sections homepage template.
Header:
- Hide Navigation on Frontpage – This option allows you to hide the navigation menu on the front page.
- Hide Header on Frontpage – This option allows you to hide the entire header section on the front page.
General:
- Site Title Font Size (px) – This will update the font size of the headers of all the frontpage sections.
- Frontpage Sections Width – This will allow you to adjust the width of the content container on the front page.
Footer:
- Hide Footer Widgets on Frontpage – This option allows you to hide the footer widgets on the front page.
- Hide Footer on Frontpage – This setting allows you to hide the entire footer on the front page.
- Footer Background Color – This setting allows you to change the background color of the footer.

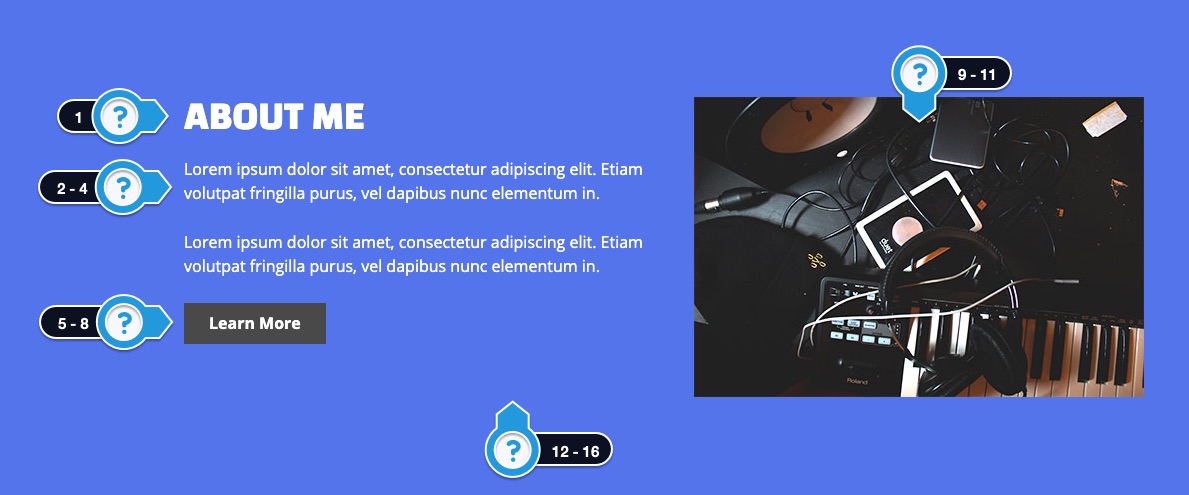
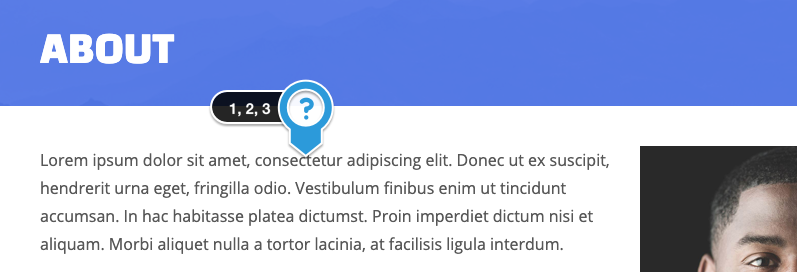
2.2 – About
This section allows you to add information about yourself, an image, and a link to read more.
Available Options:
- Title Text – Add a title to the About section to introduce the content.
- Text – Add the main text or description that you want to display in the About section.
- Text Color – Choose the color of the text in the About section to match your website’s design.
- Text Animation—To make the text more visually appealing, select an animation style. Note that not all animations may be visible in the Customizer preview.
- Button Text – Enter the text that you want to display on the button in the About section, such as “Learn More” or “Read More”.
- Button Web Address – Enter the URL that the button will link to when clicked. This could be a page with more information about you or your business.
- Open link in a new window – When enabled, the button will open the linked page in a new browser tab.
- Button Color – Choose the color of the button to make it stand out and match your website’s design.
- About Image – Upload an image to be displayed in the About section. Optimal dimensions are 450×300 pixels.
- About Image Position – Select the position of the image within the About section, such as left or right.
- Image Animation – Select an animation style for the image to make it more visually appealing. Note that not all animations may be visible in the Customizer preview.
- Background Image – Upload an image to be used as the background for the About section.
- Background Image Settings – Adjust settings such as repeat or stretch to control how the background image is displayed.
- Enable Parallax Effect – Enable a parallax scrolling effect for the background image, creating a sense of depth. Note that parallax is disabled on mobile devices.
- Background Image Color Tint – Apply a color tint to the background image to adjust its appearance and match your website’s design.
- Background Color – Choose a background color for the About section, which will be visible if no background image is used or if the image is transparent.
- Section Height – Adjust the padding above and below the content in the About section to control its height and spacing.
Requirements – You must have an about image. The image should be at least 450 x 300 pixels.
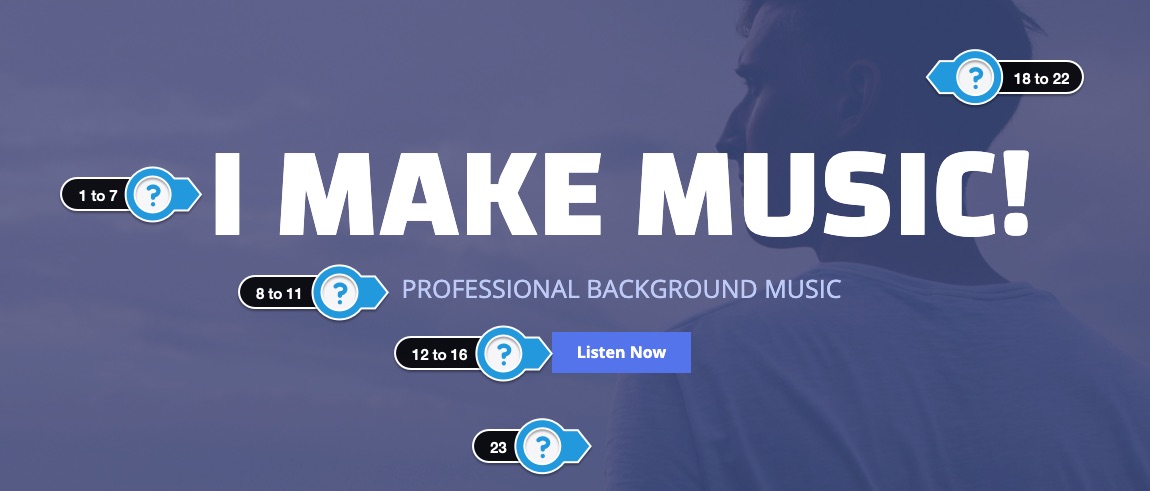
2.3 – Banner – Image
This is a homepage banner that allows you to show a headline, subheadline, and button over a background image or color. You can also upload an image in the center of the banner to replace the text.
Available Options:
- Headline Text – Limited text is suggested.
- Headline Font Size (px) – Adjust the slider to change the headline font size.
- Headline Font – Select the headline font. Font Doesn’t Work (?)
- Headline Font Weight – Not all fonts have different font weights. Adjust until the font works.
- Headline Font Color – Set the color of the headline font.
- Headline CSS Text Effect – Adds a CSS font style. Most options do not change the font color. Play with different font and background colors. There are no additional settings to modify the effects. Read More.
- Headline Animation – Not all animations will preview in the customizer.
- Subtext -Limited text is suggested: The secondary text that appears below the headline. Keep the text concise.
- Subtext Font Size (px) – Adjust the size of the subtext font (in pixels).
- Subtext Font Color – Set the color of the subtext.
- Subtext Animation
- Button Text – Enter the text to appear in the button.
- Web Address – The button appears when you enter a URL
- Open link in a new window – Opens the link in a new tab or window when the button is clicked.
- Button Color – Set the color of the button.
- Button Animation – Choose an animation style for the button.
- Banner Center Image – Adding an image will overwrite the banner text and button above. Upload a transparent PNG when placing a logo over a background image.
- Background Image – Stretched banner image dimensions should be at least 2000 x 450 pixels.
- Background Image Settings
- Enable Parallax Effect – Parallax is disabled on mobile devices.
- Banner Image Color Tint – Apply a color tint over the background image. Use the bottom slider to adjust the color opacity. Click the “Clear” button to remove the color.
- Background Color – This appears if there is no background image.
- Banner Height – Adjust the padding around banner content.
Additional Notes
- Banner Center Image Details
- If you upload a “Banner Center Image,” it should be a transparent PNG image without a background.
- Adding “Banner Center Image” will overwrite the banner text and button.
- The banner center image should not be wider than 940 pixels.
- This banner only supports one banner.
- The stretched background image size should be at least 2000 by 600 pixels.
- If you are using an image pattern, select repeat under background image settings.
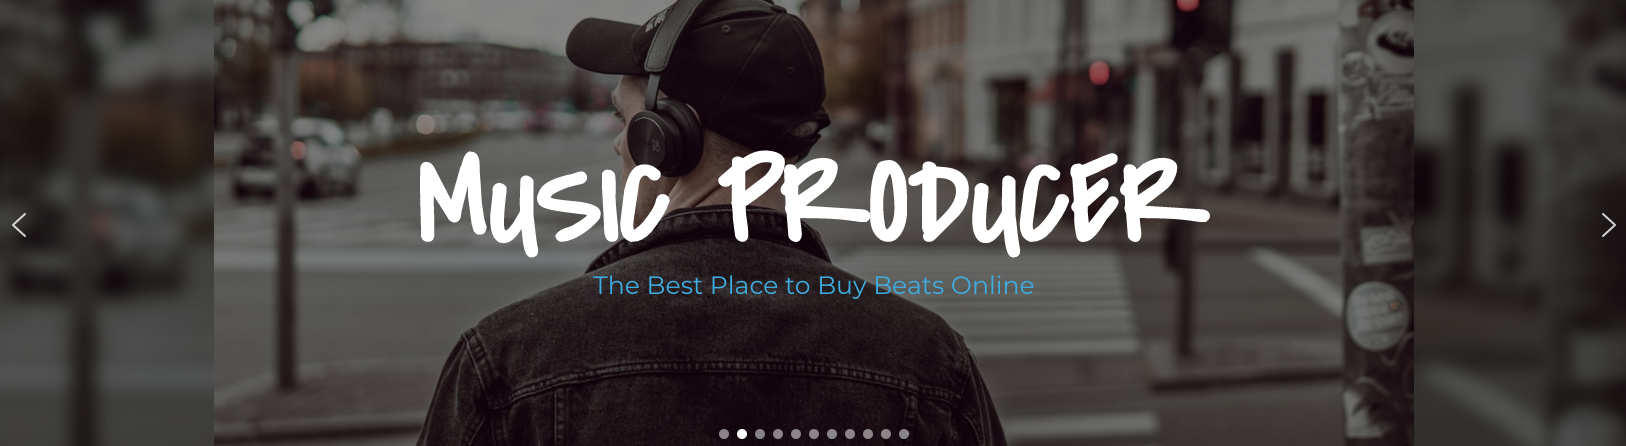
2.4 – Banner – Slider
This frontpage widget allows you to add multiple slider banners to your homepage using the Smart Slider WordPress plugin. Tutorial: How to Create Slider Banners
Available Options:
- Shortcode – Add the slider banner shortcode in this input.
- Slider Background Color – This allows you to customize the background color of the slider banner to match your website’s design.
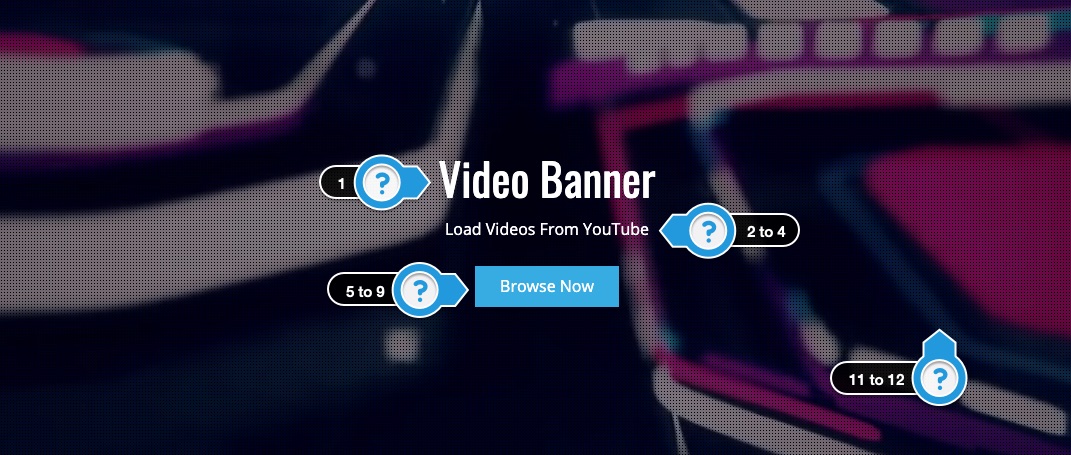
2.5 – Banner – Video
This frontpage widget allows you to add a YouTube video banner background with text and a button over the video.
Available Options:
- Headline – Limited text is suggested.
- Subtext – Limited text is suggested
- Subtext Animation – Not all animations will preview in the customizer.
- Text Color
- Button Text – Enter the text to appear in the button.
- Button Web Address – The button appears when you enter a URL.
- Open link in a new window.
- Button Color
- Button Animation – Not all animations will preview in the customizer.
- Center Image – Uploading an image will overwrite the headline text and button above.
- YouTube Video URL # ( Required ) – Example: _lj4KWrEjsk. This can be found at the end of the video URL.
- Add dark tint over video.
- Banner Image ( Mobile ) – The video banner will not play on mobile devices or tablets, so upload a banner image to appear on those devices.
- Banner Height – The options below will adjust the padding inside the banner.
Specifications
- YouTube is the only supported video option.
- No Sound: The video banners do not play audio. There is no option for sound.
- No Mobile Support: Video banners do not play on mobile devices.
- Video Looping: Videos automatically loop when finished.
- Pick videos that are longer than 40 seconds to make the loop less noticeable.
- Loop Loading Time: There is a 3 to 5-second loading time between loops. Pick longer videos to make the loop less noticeable.
Limitations
- You can only have one video.
- You can not adjust the size or positioning of the videos. It is difficult to adjust video to be responsive on different screen resolutions.
- The banner must contain text or an image. There is no option to have only a video banner.
- The banner center image should not be wider than 940 pixels.
Additional Notes
- If you have concerns with loading times, you may want to use the banner image option.
- Do not add videos that have pop-up messages because they will appear in the video.
- The button will disappear when the screen is under 500 pixels wide.
- The banner you choose should be used as a visual background.
Troubleshooting
- If the video banner does not fill the entire screen width, try adjusting the banner height in the banner video panel.
Each image below is linked to the video and includes the video ID # to paste into the customizer.
Video Disclaimer:
- These are not my videos, just videos I found on YouTube.
- If you select a YouTube video you may want to give credit to the video owner somewhere on your website.
- You are not downloading any videos, just embedding them into your website, so I don’t believe any copyright laws are being broken.
- So please use at your own discretion.
Video ID: 8t3XYNxnUBs
Video ID: ujwJeKHOo2c

Video ID: hCmpgAn9q0A

Video ID: FOQF9APMsVg

Video ID: pGbIOC83-So
Video ID: aFz_YcJI_zo
Video ID:3zAUhWtHeY
Video ID: oOUVzuuG-Go
Video ID: 43ngkc2Ejgw

Video ID: hEO09YiGF6k
Video ID: 0pXYp72dwl0
Video ID: X-dMOvEOQiM

Video ID: Sj0NEtvvUZ8
Video ID: JHRiaKEYeis
Video ID: aMKVQhKEKBU

Video ID: pXU_GY7hjPc
Video ID: a-11dtG7aK4
Video ID: 7c4WYzr30B0
Video ID: iGpuQ0ioPrM

Video ID: q0ZeZF4W37w

Video ID: NVb5GV6lntU
Video ID: Cfj_gTEiKwE
Video ID: zX8UU8UBQhw

Video ID: d4JuUYmiAbo
Video ID: 9Ep_h8vxgEU

Video ID: Jr_J2YUXms8

Video ID: 4G0bIKKz8-o

Video ID: VijPGj4DZrM
Video ID: Qnl6dBJzNUQ
Video ID: h4x9hgrPUiQ
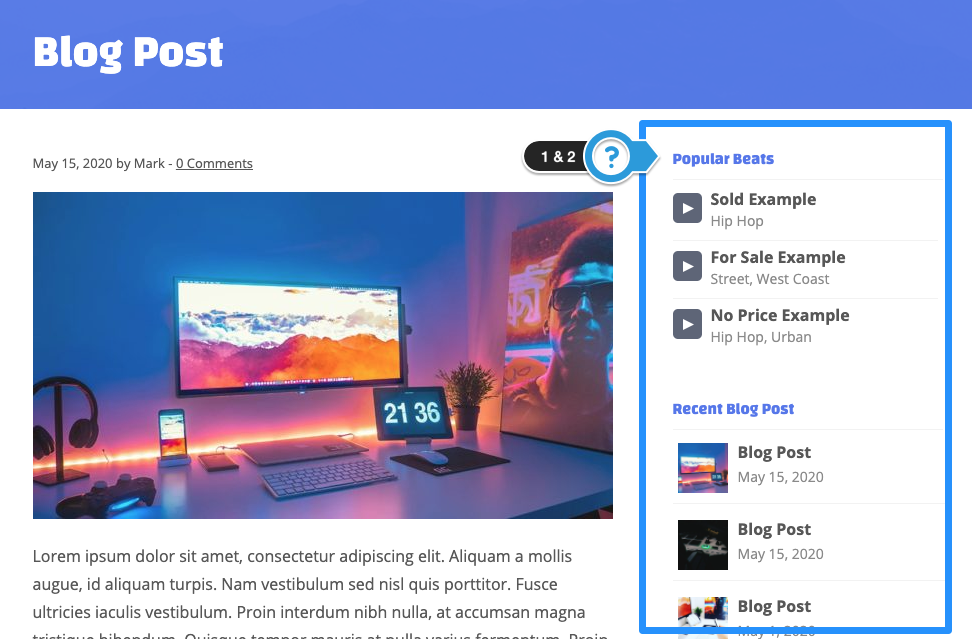
2.6 – Beats
This section displays the beat player along with customizable text. Note: Only 5 beats will load in the customizer.
Available Options:
- Title – Add a title to the section.
- Text ( Top ) – Text appears above the beat player.
- Text ( Bottom ) – Text appears below the beat player.
- Text Color – Adjust the color of the text.
- Playlist Height – Adjust the height of the beat player.
- Beat Store Sidebar – This option will display the “Beat Store Homepage” sidebar next to the beat store playlist on the Frontpage Sections template.
- Background Image – Upload a custom background image.
- Background Image Settings
- Enable Parallax Effect
- BG Image Color Tint
- Background Color – Select a background color.
- Section Height – This adds padding above and below the beat player section.
- Section Animation
Additional Info
- Only 5 beats load when using the customizer to decrease the loading time when using the customizer.
- The full-width Beat Store Playlist is the only option for the Frontpage Sections.
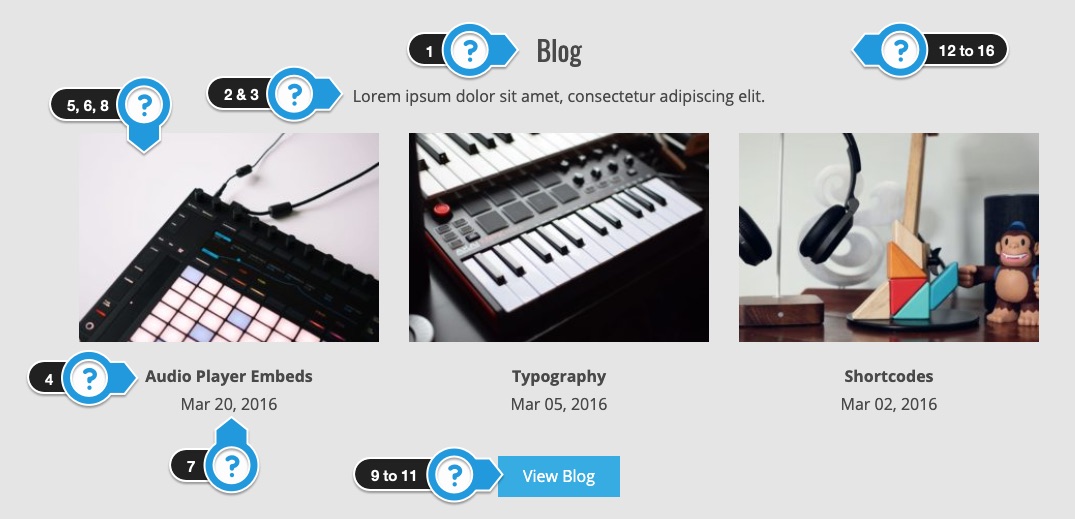
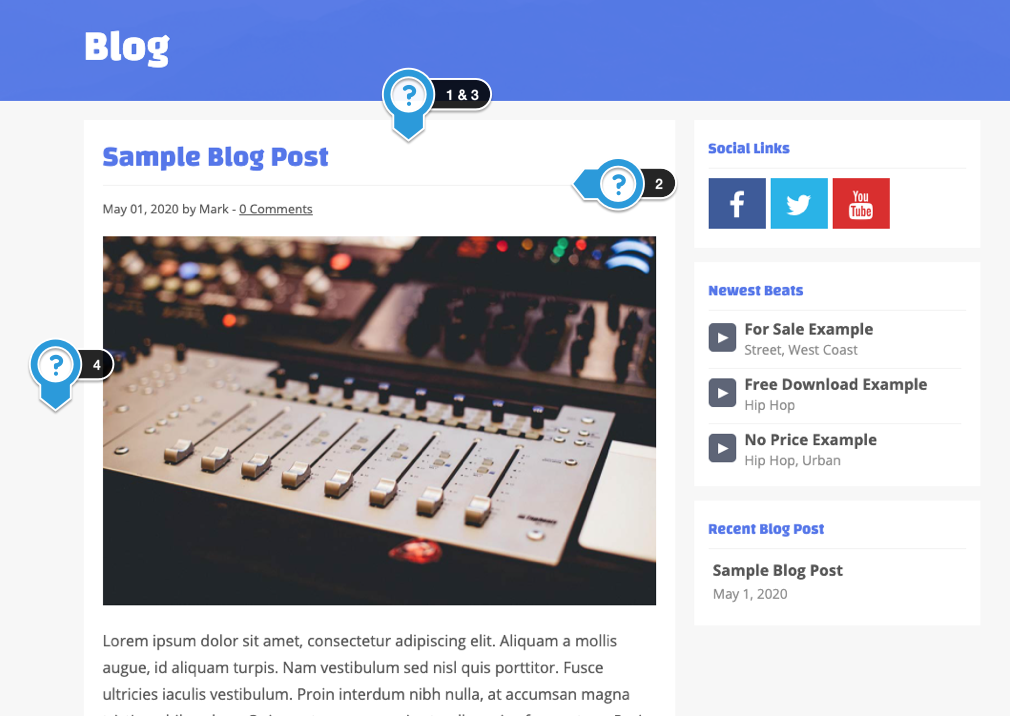
2.7 – Blog
This widget allows you to display your latest blog posts, along with images, titles, and a button to read more.
Available Options:
- Title
- Text
- Text Color
- Blog Post Name Color
- Number of Blog Posts
- Show Images
- Show Date
- Article Animation – Not all animations will preview in the customizer.
- Button Text – Enter the text to appear in the button.
- Button Web Address – The button appears when you enter a URL.
- Button Color
- Background Image
- Background Image Settings
- Enable Parallax Effect
- BG Image Color Tint
- Background Color
- Section Height – Adjust padding above & below content.
Additional Notes
- The blog posts MUST have featured images added to appear on the front page.
- Display 3 to 6 posts.
2.8 – Contact
Add a contact form to your homepage using the Contact 7 WordPress plugin.

Contact Form Code Mentioned in the Video
[text* your-name placeholder "Your Name (required)"]

[email* your-email placeholder " Email (required)"]

[text your-subject placeholder "Subject"]

[textarea your-message  placeholder "Message"]

[submit "Send"]
How to Install the Contact Form Plugin
- Click Add New under plugins on the sidebar.
- Search for Contact 7.
- Click the Install Now, then Activate button.
- Click Add New under Contact on the sidebar.
- Give the form a title. Contact for example.
- Click the Save button on the right.
- Copy the shortcode in blue on the page.
- Go to Customize > Frontpage Sections > Contact
- Paste the shortcode into the Contact Form 7 Shortcode input.
Additional Info
- No other contact form plugins have been tested. It is not guaranteed all plugins will work.
Available Options:
- Title
- Text
- Text Color
- Text Animation
- Contact Form 7 Shortcode
- Button Color
- Form Animation
- Background Image
- Background Image Settings
- Enable Parallax Effect
- BG Image Color Tint
- Background Color
- Section Height
2.9 – Email
Embed an email form from your favorite email marketing service to capture email addresses.
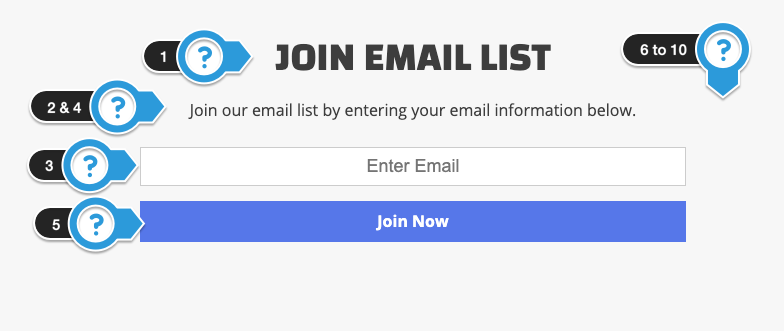
Important: This email input does NOT work by default. It is sample email form.
Copy and paste the email form code from whatever email marketing company you are using like Aweber or Mailchimp.
Requirements
- Enter plain email form code from your email marketing service provider.
- Do not enter forms with CSS styling.
- CSS has already been added for Inputs, Buttons, and Labels
- Clean up the email from of unnecessary code.
- Test the form out to make sure it works.
Basics of a clean email form.
<form>
<!–Label –>
<label>Name</label>
<!–Input –>
<input type=”text” placeholder=”Enter Name”/>
<!–Label –>
<label>Email</label>
<!–Input –>
<input type=”text” placeholder=”you@example.com”/>
<!– Button –>
<input type=”submit” value=”Submit” />
</form>
Available Options:
- Title
- Text – Enter text to appear above the email form.
- Email Form Code – Enter the HTML form code from your email marketing service.
- Text Color
- Button Color
- Background Image
- Background Image Settings
- Enable Parallax Effect
- BG Image Color Tint
- Background Color
- Section Height
- Section Animation
2.10 – Photos
Display the latest photos in your photo gallery and add a button to view more.
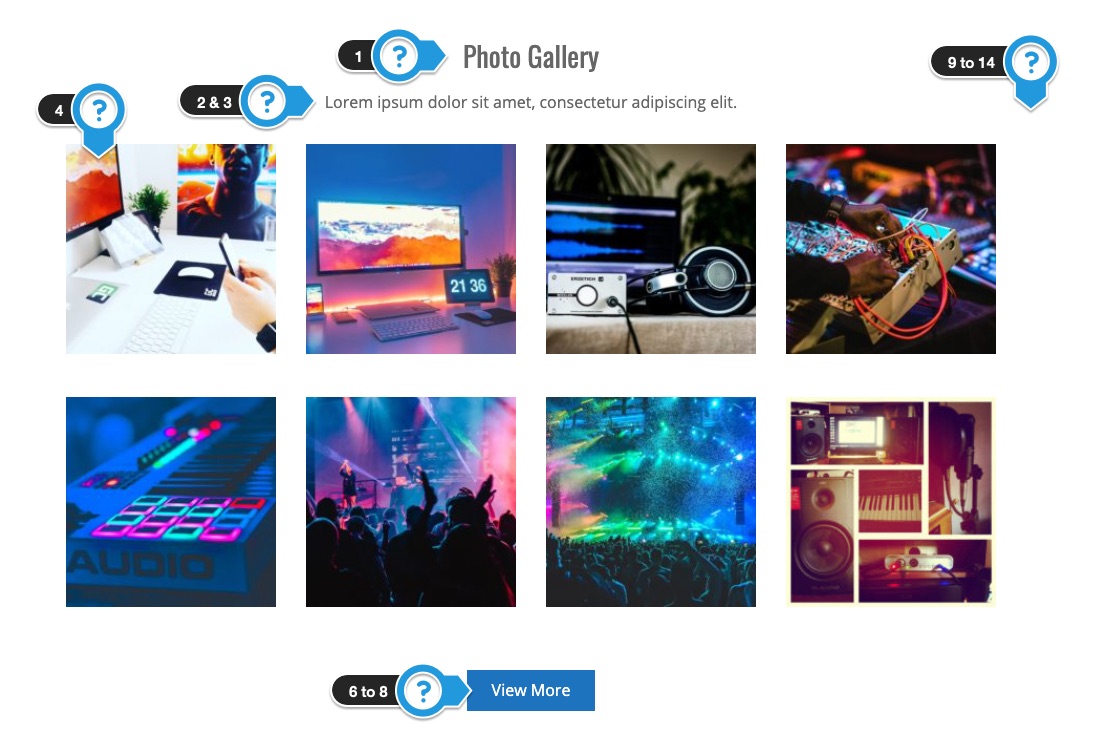
Available Options:
- Title
- Text
- Text Color
- Number of Photos
- Show Photo Title
- Button Text – Enter the text to appear in the button.
- Button Web Address – The button appears when you enter a URL.
- Button Color
- Background Image
- Background Image Settings
- Enable Parallax Effect
- Parallax is disabled on mobile devices.
- BG Image Color Tint
- Background Color
- Section Height
- Photo Animation
2.11 – Pricing Table
Display a pricing table on your homepage for visitors to learn about license details.
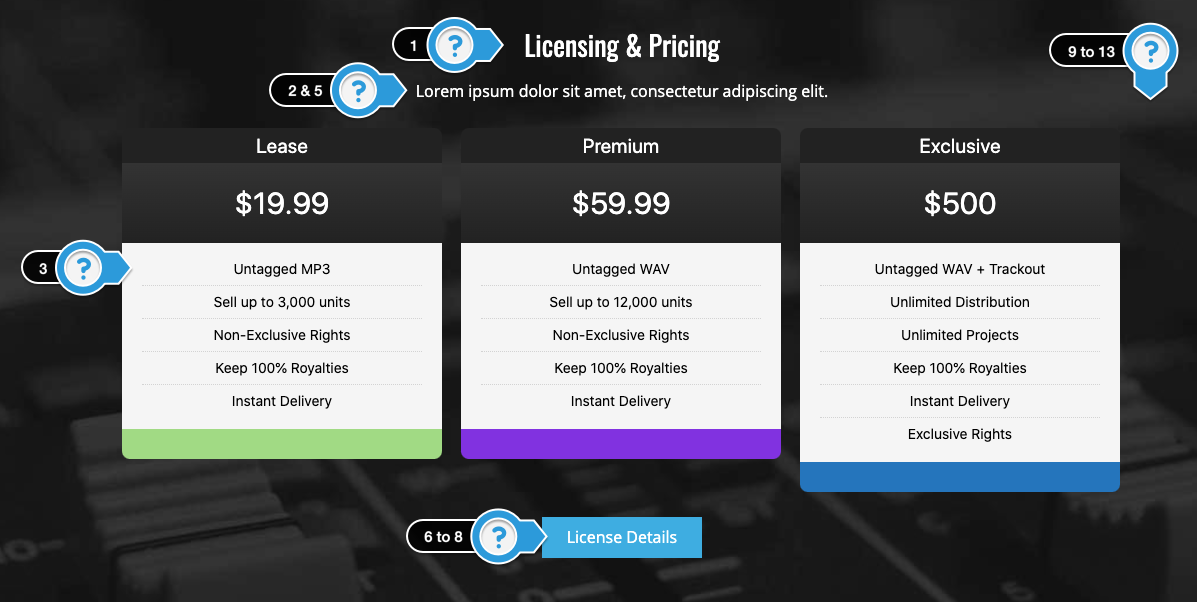
Available Options:
- Title
- Text – Above Table
- Pricing Table Shortcode
- Text – Below Table
- Text Color
- Button Text – Enter the text to appear in the button.
- Button Web Address – The button appears when you enter a URL.
- Button Color
- Background Image
- Background Image Settings
- Enable Parallax Effect
- BG Image Color Tint
- Background Color
- Section Height – Adjust padding above & below content.
- Section Animation
Display a pricing table on your homepage.
There are two pricing table plugins that have been tested.
Follow the tutorial for the one you would like to add to your homepage.
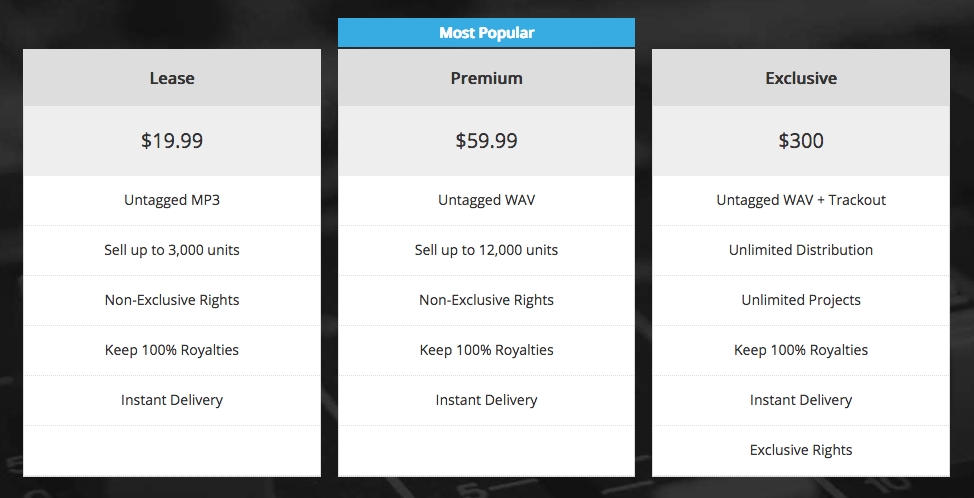
Option 1. Responsive Pricing Table

How to Create the Pricing Table
- Click Add New under Plugins on the sidebar.
- Search for Responsive Pricing Table.
- Click Install Now, then Activate.
- Click Add New under Pricing Tables on the sidebar.
- Give the table a title. Example: Pricing Table
- Add Pricing Column
- Enter your license information – You can use the Sample Licensing Text below.
- Example: Add Lease to the Title input.
- Add $19.99 to Price.
- Add this text to the features list:
Untagged MP3
Sell up to 3,000 units
Non-Exclusive Rights
Keep 100% Royalties
Instant Delivery - Select a Color to appear under the column.
- Click Add another plan to add the next column and repeat steps 1 to 5 under add pricing column.
- Once you are done adding columns, click the Publish button.
- Click All Pricing Tables under Pricing Tables on the sidebar.
- Copy the shortcode for the table you just created.
- Once you are done, add the pricing table shortcode to Customize > Frontpage Sections > Pricing Table
- Click the Save & Publish button to make changes live.
Sample Licensing Text
Lease
- $19.99
- Untagged MP3
- Sell up to 3,000 units
- Non-Exclusive Rights
- Keep 100% Royalties
- Instant Delivery
Premium
- $59.99
- Untagged WAV
- Sell up to 12,000 units
- Non-Exclusive Rights
- Keep 100% Royalties
- Instant Delivery
Exclusive
- $300
- Untagged WAV + Trackout
- Unlimited Distribution
- Unlimited Projects
- Keep 100% Royalties
- Instant Delivery
- Exclusive Rights
Option 2. Easy Pricing Tables by Fatcat Apps
How to Create the Pricing Table
- Click Add New under Plugins on the sidebar.
- Search for Easy Pricing Tables by Fatcat Apps
- Click Install Now, then Activate.
- Close alert pop up.
- Click Add New under Pricing Tables on the sidebar.
- Give the table a title. Example: Pricing Table.
- Click the New Column button to add a third column.
- Add Pricing Column
- Enter your license information – You can use the Sample Licensing Text below.
- Example: Add Lease to the Name input.
- Add $19.99 to Pricing
- Add this text to the Features:
Untagged MP3
Sell up to 3,000 units
Non-Exclusive Rights
Keep 100% Royalties
Instant Delivery - Repeat the steps above for the next column.
- Click the Feature button for your most popular license option
- Once you are done adding columns, click the Save button.
- Click the Deploy button.
- Copy the shortcode.
- Add the pricing table shortcode to Customize > Frontpage Sections > Pricing Table
- Click the Save & Publish button to make changes live.
Sample Licensing Text
Lease
- $19.99
- Untagged MP3
- Sell up to 3,000 units
- Non-Exclusive Rights
- Keep 100% Royalties
- Instant Delivery
Premium
- $59.99
- Untagged WAV
- Sell up to 12,000 units
- Non-Exclusive Rights
- Keep 100% Royalties
- Instant Delivery
Exclusive
- $300
- Untagged WAV + Trackout
- Unlimited Distribution
- Unlimited Projects
- Keep 100% Royalties
- Instant Delivery
- Exclusive Rights
Pricing Table Section Options
- Add text above and below the Pricing Table.
- Add a background image or select a solid background color.
- You can enable a Parallax image scrolling effect.
- You can add an optional button below the pricing table.
2.12 – Production Credits
Your homepage can display up to 6 production credits. You can also add a button to link to a page with more information about your work.
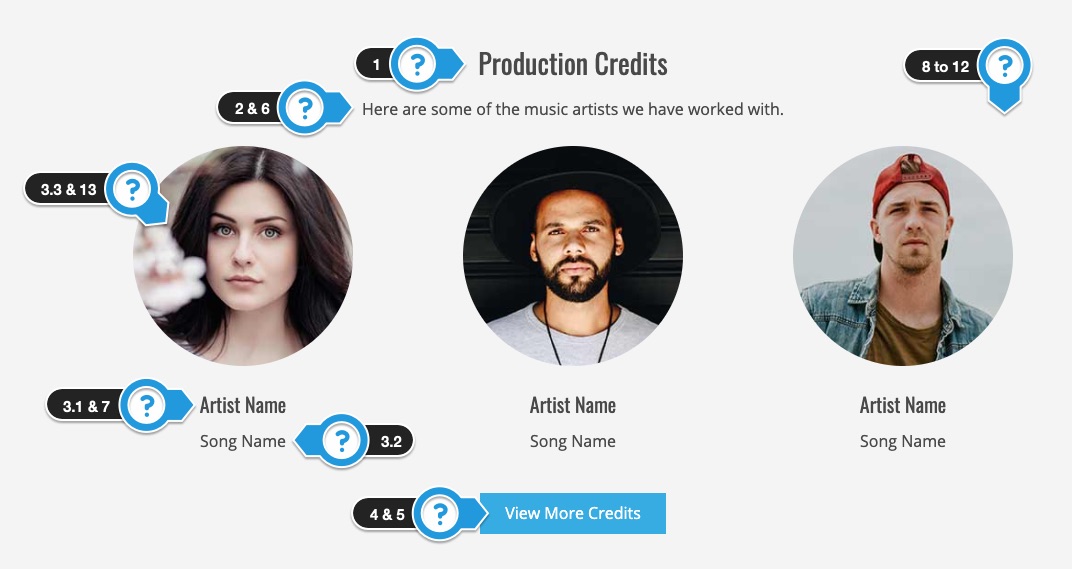
Available Options:
- Title
- Text
- Artist #1 to #6
- Artist Name
- Song Name
- Image – Suggested size: 240 x 240. Incorrect dimensions may cause problems.
- Button Text – Enter the text to appear in the button.
- Button Color
- Text Color
- Artist Name Color
- Background Image
- Background Image Settings
- Enable Parallax Effect
- BG Image Color Tint
- Background Color
- Make images circles.
- Section Height – Adjust padding above & below content.
- Artist Animation
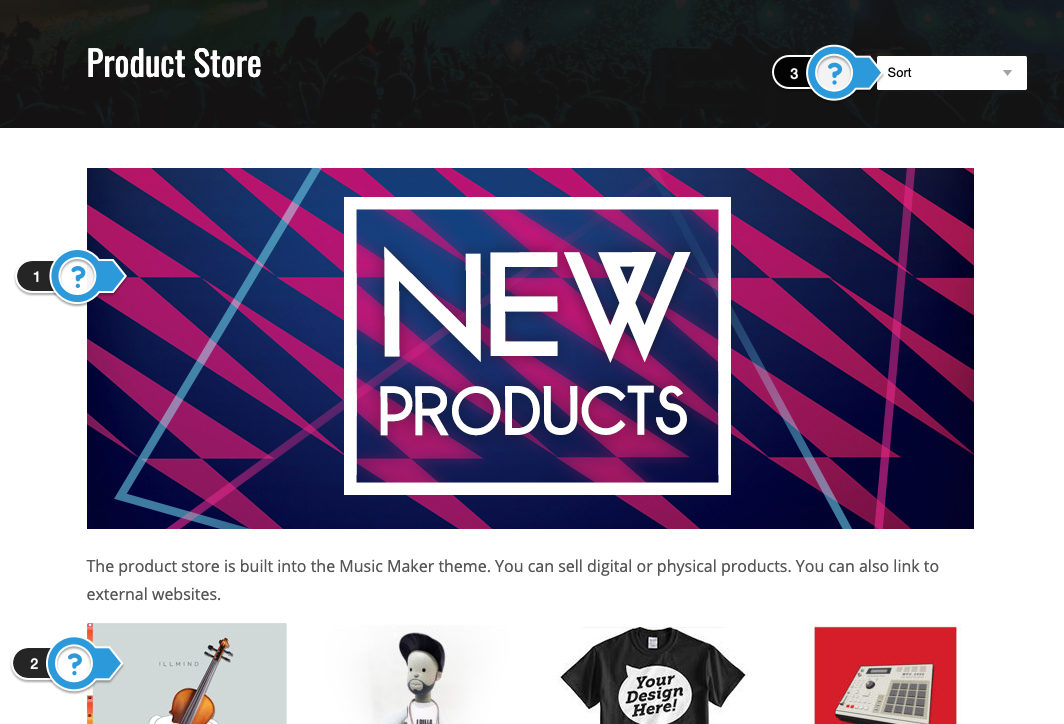
2.13 – Products
This widget allows you to display 4 to 12 of your latest products.
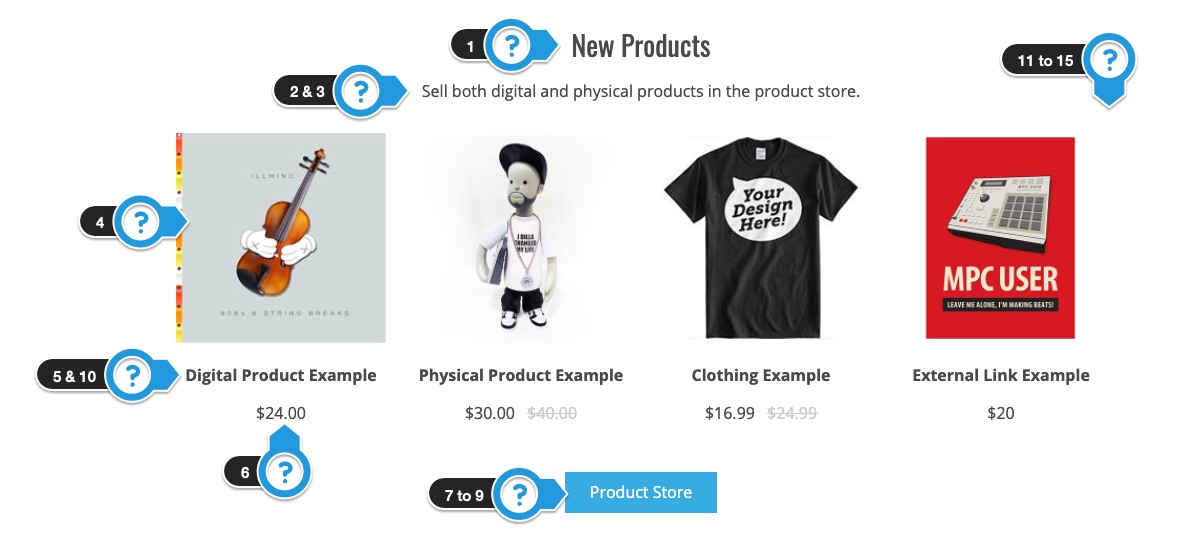
Available Options:
- Title
- Text
- Text Color
- Number of Products
- Show Product Name
- Show Price
- Button Text – Enter the text to appear in the button.
- Button Web Address – The button appears when you enter a URL.
- Button Color
- Product Name Color
- Background Image
- Background Image Settings
- Enable Parallax Effect
- BG Image Color Tint
- Background Color
- Section Height – Adjust padding above & below content.
- Product Animation
Requirements
- Products will only appear if you have published products to your product store.
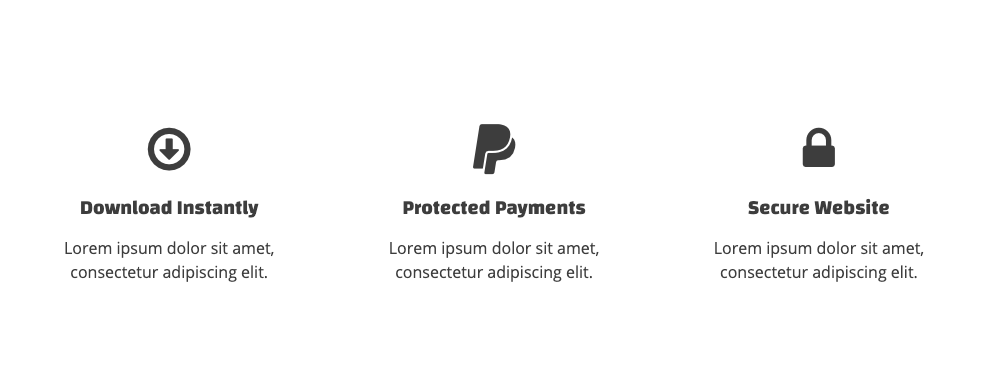
2.14 – Services
You can use this widget to promote and link to services you offer.
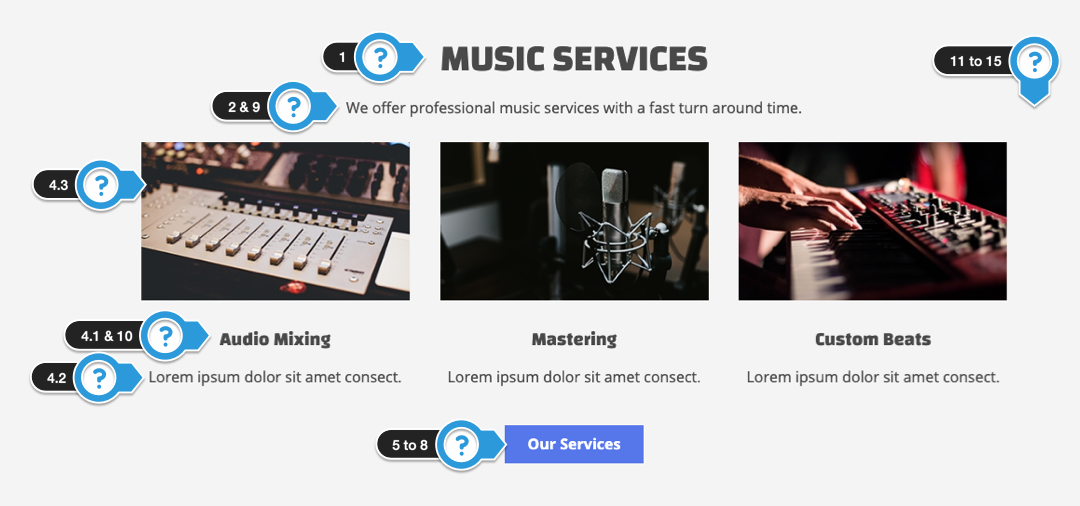
Available Options:
- Title
- Text
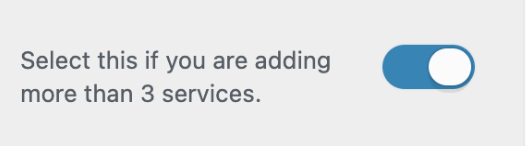
- Select this if you are adding more than 3 services.
- IMPORTANT – If you are trying to show more than 3 services, you must enable this option.
- IMPORTANT – If you are trying to show more than 3 services, you must enable this option.
- Service #1 to #6
- Title
- Text
- Image – Suggested size: 330 x 190. Incorrect dimensions may cause problems.
- URL
- Button Text – Enter the text to appear in the button.
- Button Web Address – The button appears when you enter a URL.
- Open link in a new window.
- Button Color
- Text Color
- Service Title Color
- Background Image
- Background Image Settings
- Enable Parallax Effect– Parallax is disabled on mobile devices.
- BG Image Color Tint
- Background Color
- Section Height – Adjust padding above & below content.
- Section Animation
Options
- Add up to 6 services with a picture, title, description, and link to a page.
2.15 – Social Icons
Display social icons to your different social profiles.
Available Options:
- Title
- Text
- Text Color
- Social Icons
- Icon Background Color
- Icon Color
- Background Image
- Background Image Settings
- Enable Parallax Effect
- BG Image Color Tint
- Background Color
- Section Height
- Section Animation
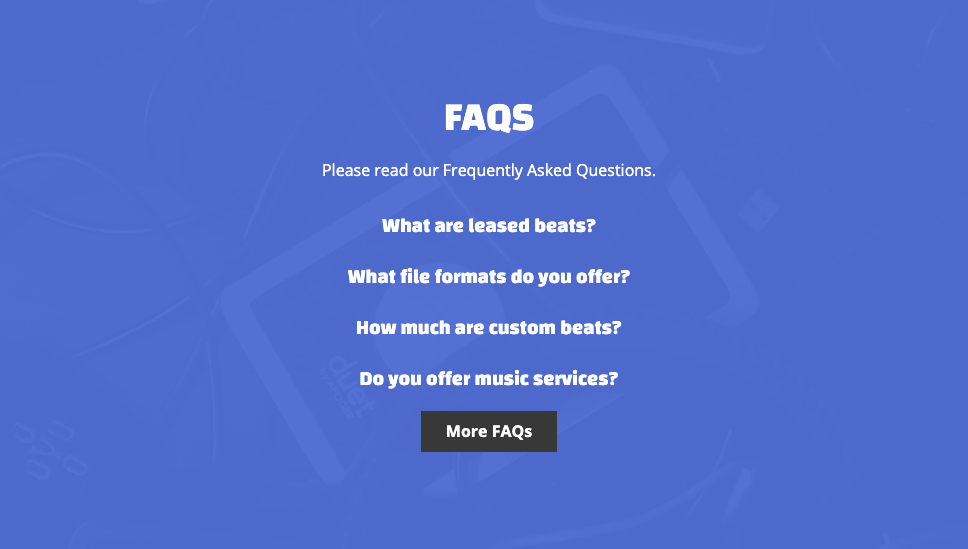
2.16 – Text 1 to 5
The frontpage text widgets are flexible text widgets that allow you to add custom text messages or shortcodes for 3rd party plugins.
Examples of uses include FAQs, marketing messages, testimonials, other beat players, and more.

Available Options:
- Title
- Text
- Text Color
- Shortcode ( Optional ) – You can include shortcodes from 3rd party plugins to display different content on your homepage.
- Button Text – Enter the text to appear in the button.
- Button Web Address – Button appears when you enter a URL.
- Open link in a new window.
- Button Color
- Background Image
- Background Image Settings
- Enable Parallax Effect
- BG Image Color Tint
- Background Color
- Section Height – Adjust padding above & below content.
- Section Animation
Additional Notes
- Add a shortcode from a 3rd party plugin.
- It is not guaranteed all shortcodes will work.
- No support is given for 3rd party plugins.
- Instagram plugin mentioned in this video.
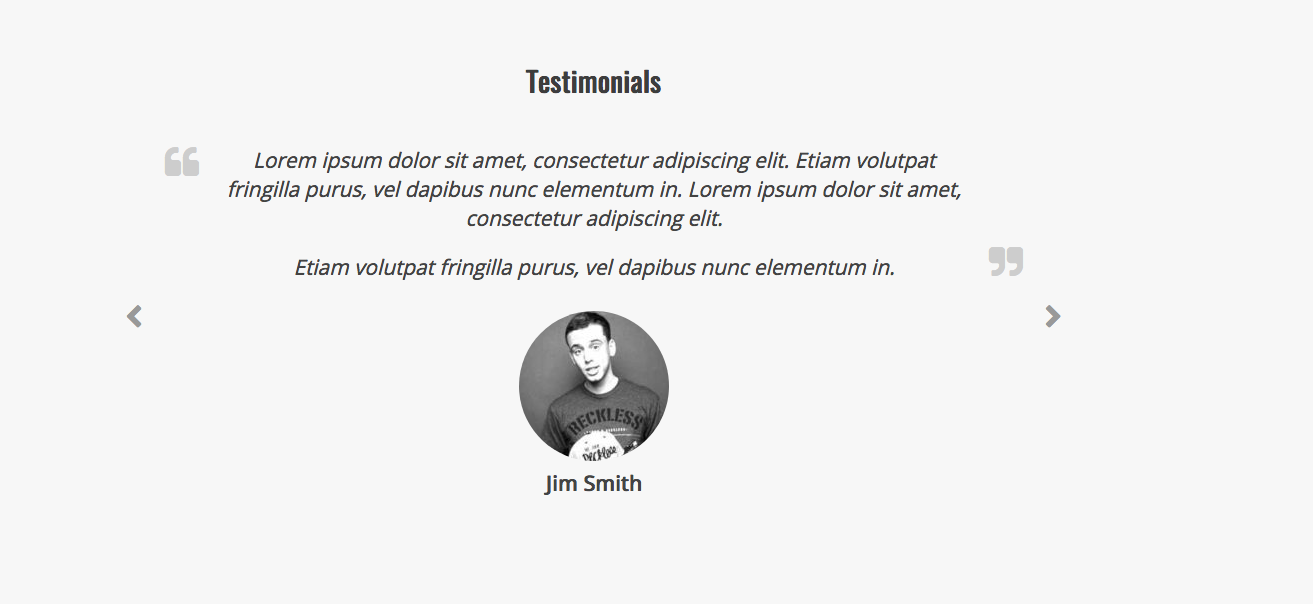
Example Text Sections

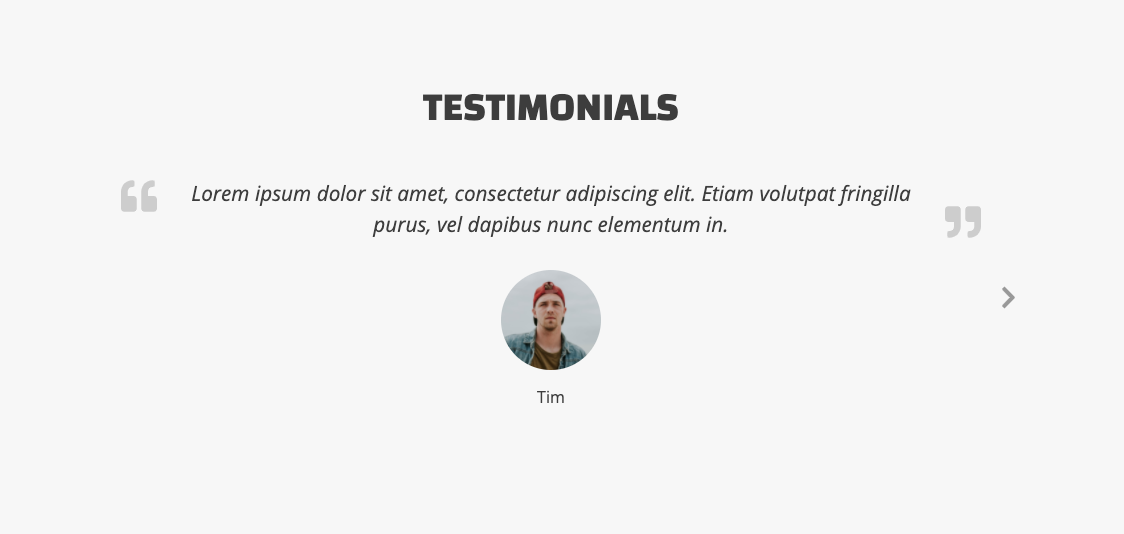
The testimonial section you see on the demo site is using a Frontpage: Text widget and a testimonial plugin.
Here are the steps to follow to add this section:
Add Testimonial Plugin
- In WordPress click Add New under Plugins on the sidebar.
- Search for Strong Testimonials.
- Click Install Now, then Activate.
- How to Add Testimonials
- Click Add New under Testimonials on the sidebar.
- Enter a title.
- Enter a testimonial in the big text area.
- Enter a name in the Full Name input.
- Add the persons photo by clicking Add Image under featured image.
- Click the Publish button.
- Repeat these steps to add more testimonials.
- Click Views on the sidebar under Testimonials.
- Click the Add New button.
- Next to mode click Slideshow.
- Under Fields uncheck Title.
- Under Style check Modern.
- Click the Save Changes button.
- The shortcode should appear at the top of the page, click the Copy to Clipboard button.
Add Testimonial Section
- Click Customize on the sidebar under Appearance.
- The customizer will open up with your homepage. If the Frontpage Section template is not your homepage, close the customizer, go to All Pages, find the Frontpage template you created and click the view link. Then click the Customize link.
- Click Widgets.
- Click Frontpage Sections.
- Add one of the Frontpage: Text widgets ( Maybe 4 or 5 )
- Drag the widget to where you want it to appear on the page.
- Click the Refresh in Customizer link to update the page.
- Scroll down the page to where the new text widget is and click the pencil icon.
- Edit the section title to Testimonials or what ever you like.
- Empty the 2nd text input.
- Paste the shortcode into the shortcode input.
- Make any other additional changes to the section and click the Save & Publish button when you are done.
You can add more testimonials, or modify the testimonial settings under Testimonials on the WordPress sidebar.
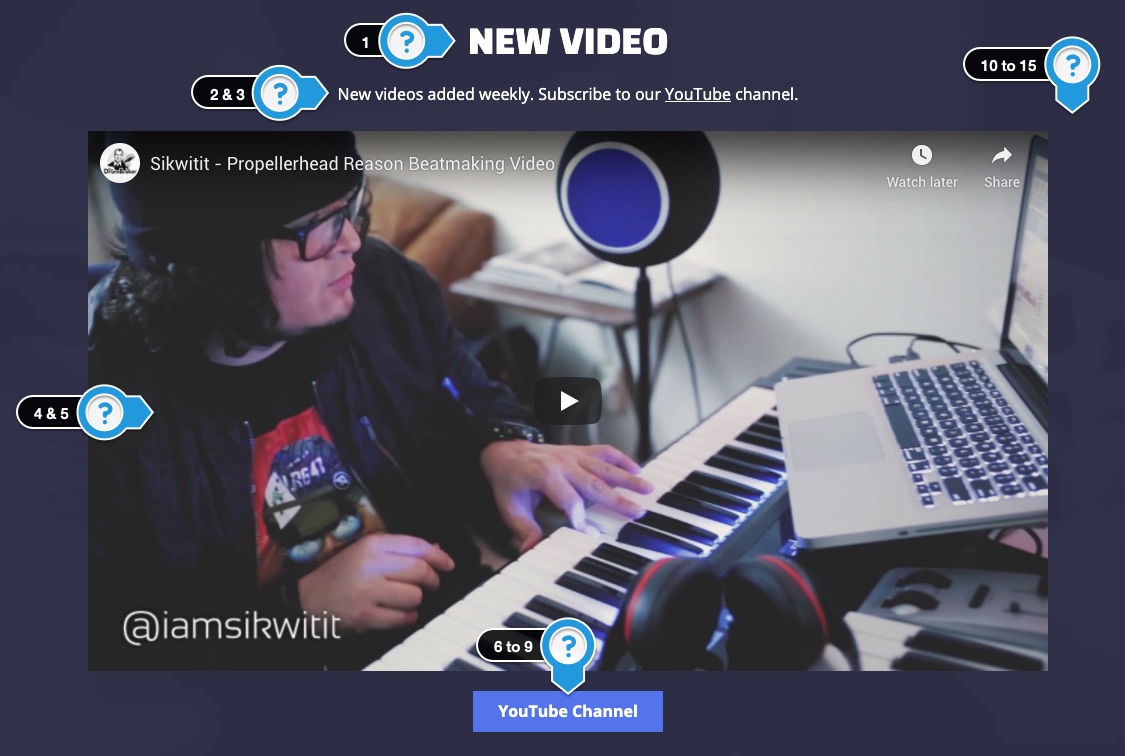
2.17 – Video
Display a YouTube or Vimeo video on your homepage.
Available Options:
- Title
- Text
- Text Color
- Select Video Type: YouTube / Vimeo
- Video URL # – Example: GYSZAwNXyM. This can be found at the end of the video URL.
- Button Text – Enter the text to appear in the button.
- Button Web Address – The button appears when you enter a URL.
- Open link in a new window.
- Button Color
- Background Image
- Background Image Settings
- Enable Parallax Effect
- BG Image Color Tint
- Background Color
- Section Height – Adjust padding above & below content.
- Section Animation
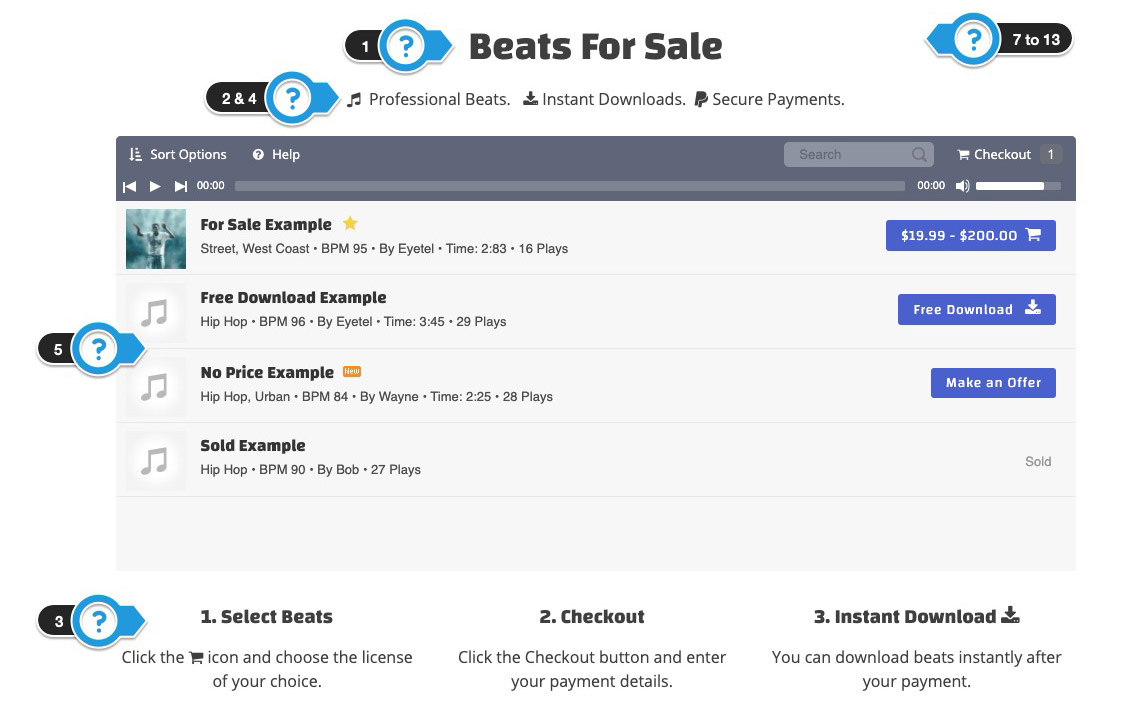
3. Beat Store Settings
3.1 General Settings ( Panel )
a. Settings
- Playlist Button Settings – This setting controls how the for sale, no price, and free download buttons work. When clicked, the information will open in an overlay window, or send users to the single beat page.
- Options: Open Overlay Window / Send Users to Single Beat Page
- Order of Beats – Newest Beats First / Random
- Select the Beat Store Homepage – Update the continue shopping and home button on the single beat page.
- Beat Store Layout – Stacked / Columns
- Autoplay Playlist – The autoplay does not work on mobile.
- Show Genre
- Show BPM
- Show Produced By
- Show Time
- Show Play Count Text
- Custom Play Count Text – This text appears in front of the play count.
- Custom Time Text – This text appears in front of the time.
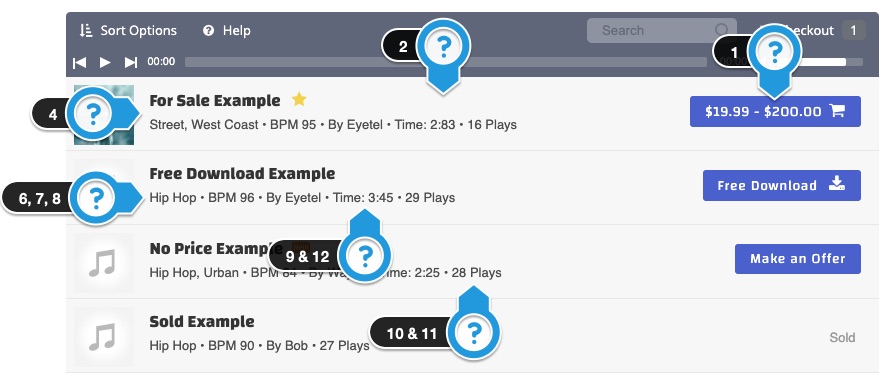
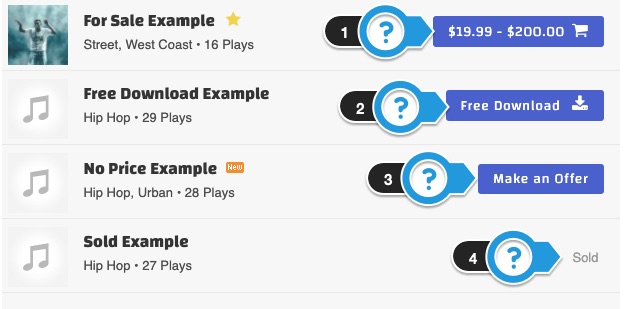
b. Beat Store Buttons
- For Sale Button Text
- Button Text Option: Show The Price / Show Custom Text
- Custom For Sale Button Text – Limit text characters. It only appears if you select the custom text option.
- Free Download Button Text
- Free Download Text
- For Sale Button Text if Price is $0.00 – This option is if you select the for sale option as the beat status, and you leave the price blank. This text will replace the 0.00 in the beat store playlist.
- No Price Button Text
- No Price Button Text – Appears in the beats store and single beat page. I.e., Make an Offer
- Button Link – The button appears inside the overlay window or on the single beat page.
- Custom Button URL – Enter a URL if you selected Custom Button URL
- Sold Button Text
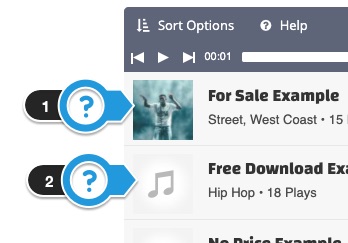
c. Beat Thumbnails
- Show Thumbnails – Show or hide thumbnails in the beat player.
- Default Thumbnail – Add a custom default thumbnail for all beats. Upload a square image. At least 300 x 300.
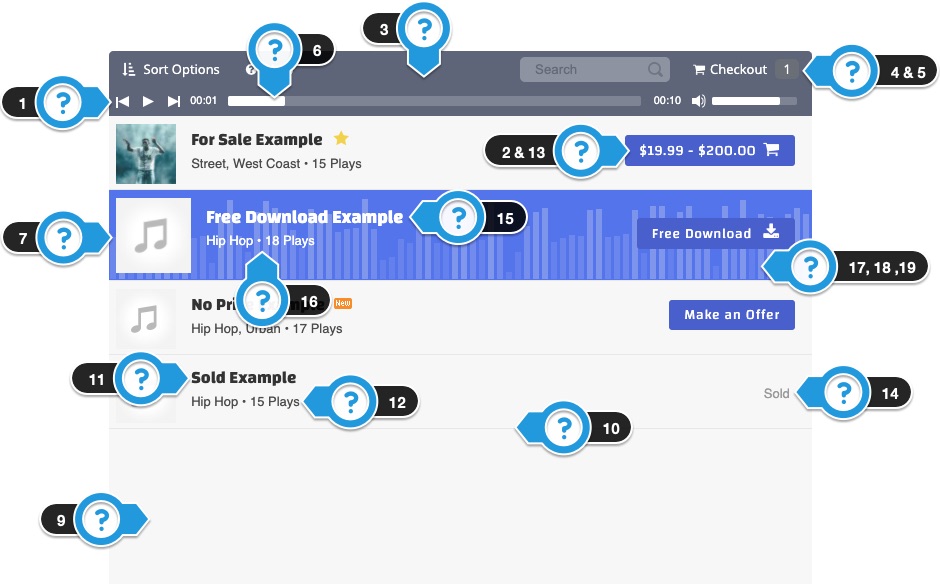
d. Playlist Colors
Customize the audio player colors. Click the clear button to use the default colors.
- Audio Player Color – Controls the color of the audio player.
- Buy Button Color – This is for the main button in the playlist.
- Beat Sort Bar Background Color – This bar appears over the audio player.
- Beat Sort Bar Checkout Button Color – Select a color of the checkout button when an item is added to the shopping cart. The page will have to refresh for the color to appear.
- Count Circle Color – Color circle in the sorting dropdown & cart number.
- Progress Bar Color – Color for the progress bar and volume.
- Active Beat – BG Color – The active beat is the beat that is currently playing in the playlist.
- Playlist Theme Color – Dark Theme or Light Theme
- Playlist Background Color – Controls the BG color of the playlist.
- Playlist Border Color – This is the border that appears between beats.
- Beat Name Color – This controls the beat name color.
- Subtext Color – This text appears under the beat name.
- Buy Button Text Color – Text color for the buy button.
- Sold Text Color
- Active Beat – Name Color
- Active Beat – Subtext Color
- Animated Bars Color – The animated bars appear in the active beat.
- Show Animated Bars on Active Beat – The animated bars do not sync with the audio.
- Animated Bars Opacity
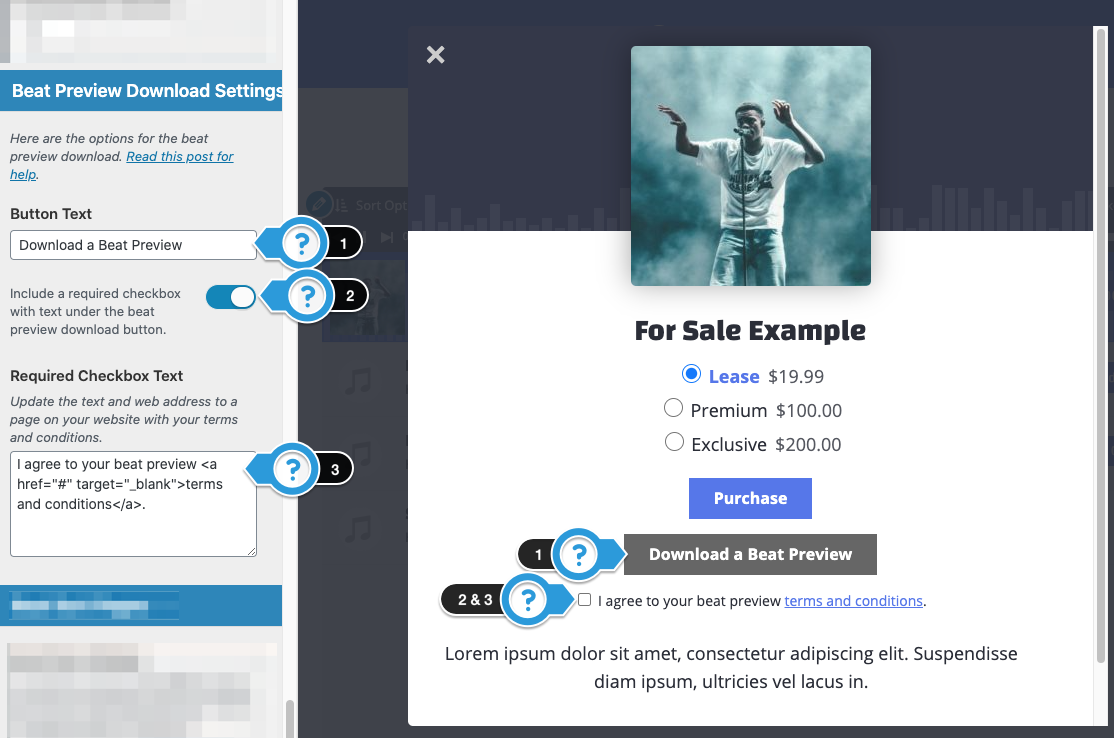
e. Beat Preview Download Settings
Here are the options for the beat preview download. Read this post for help.
- Button Text
- Include a required checkbox with text under the beat preview download button.
- Required Checkbox Text – Update the text and web address of a page on your website with your terms and conditions.
f. Beat Sort Pages
- Beat Store Sidebar – This option controls the sidebar on the Beat Store homepage & beat sort pages. This option does not affect the Frontpage Sections template.
- Options: Include Sidebar / Full Width
- Beat Sort Page Title – Appears above the beat store on the search and paginated template.
- Playlist Height – This affects the beat store playlist templates.
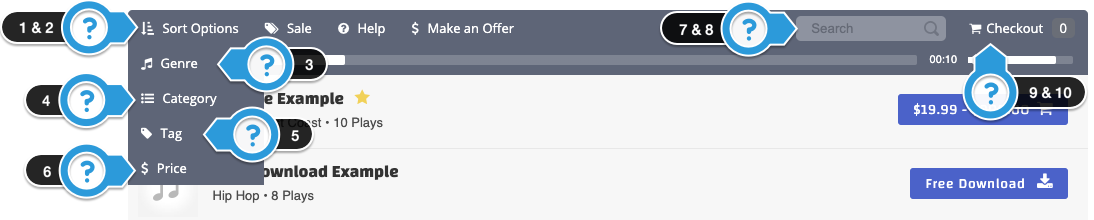
3.2 Beat Sort Bar ( Panel )
The beat sort bar is the bar that appears over the beat store playlist to search and sort beats.
- Sort Bar Settings – Show Bar / Hide Bar
- Sort Button Text
- Show Genre
- Show Categories
- Show Tags
- Show Price
- Show Search Input
- Search Input Text
- Show Checkout Button
- Checkout Button Text
3.3 Overlay Window Settings ( Panel )
a. General Overlay
These are the settings for the overlay window that appears when you click the button inside the beat store playlist.
- Hide Animated Bars – Show or hide animated bars in the overlay window.
- Show Social Icons – Show or hide social icons in the beat overlay window.
- Overlay Image Background Color
- Overlay Image Background Image
- Pricing Table Shortcode – Add a pricing table shortcode to display a pricing table in the beat overlay window and single beat pages.

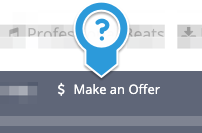
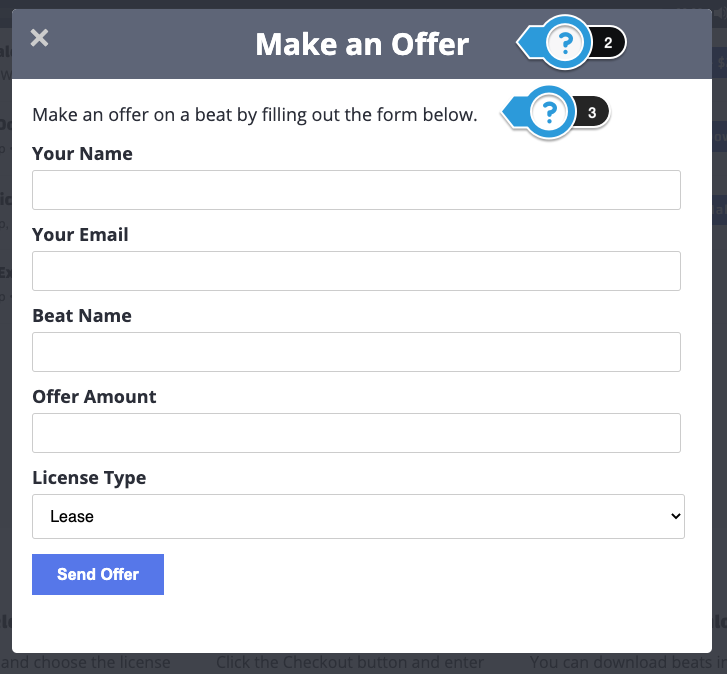
b. Make an Offer Overlay
Overlay window for beats with “No Price”. This allows you to add a form from Contact 7 for visitors to make an offer on a beat.
- Show Button in Beat Sort Bar
- Overlay Title – This changes the title for the button and overlay window.
- Description Text – Here you can include text above the make an offer form.
- Offer form Shortcode – Create a Make an Offer form in Contact 7 and add the shortcode below.
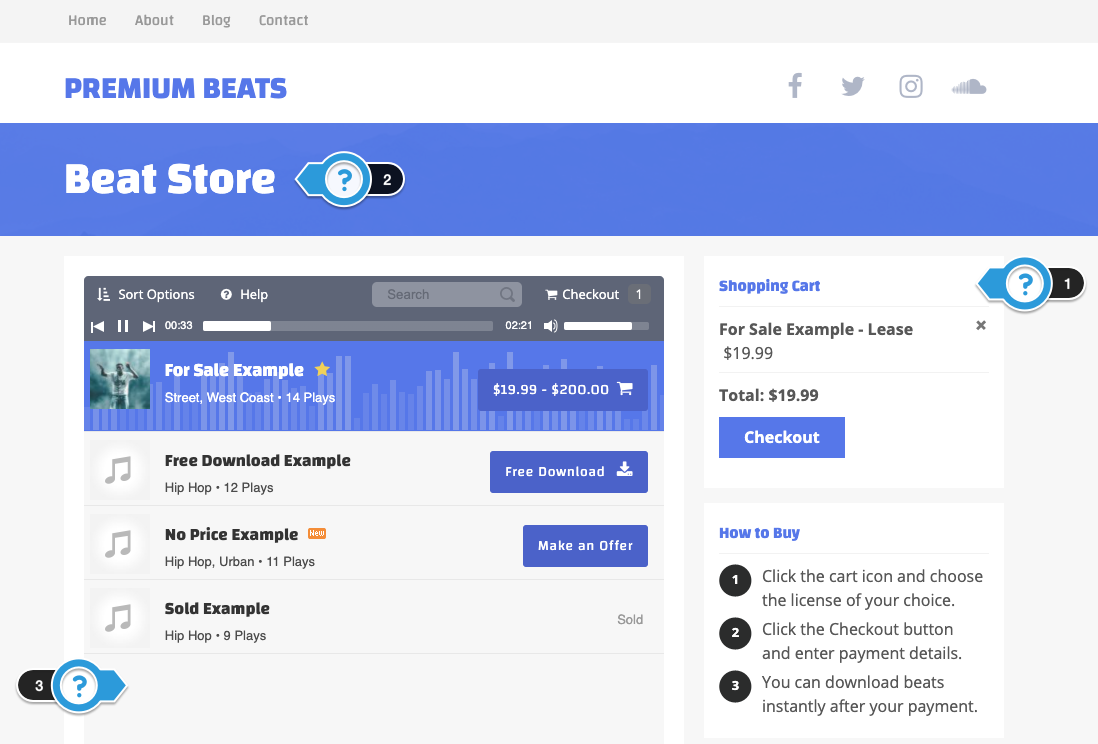
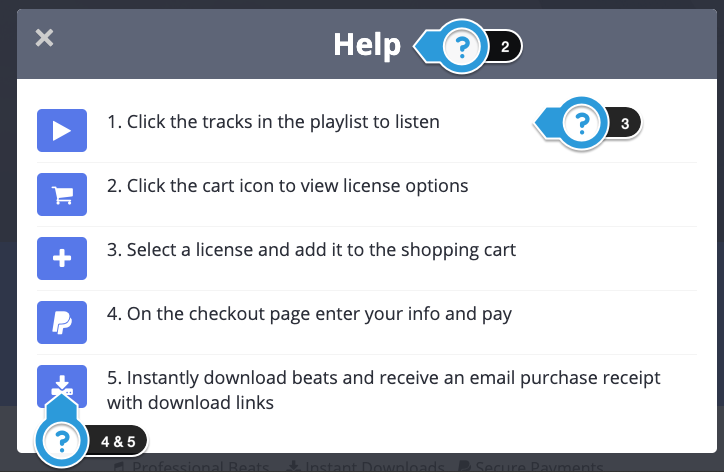
c. Instructions Overlay
Use this overlay to provide instructions on how to buy beats from your website.
- Show “Help” Button in Beat Sort Bar
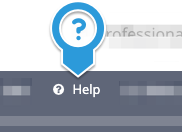
- Instructions Button Text – Limit text. Example: Help, Instructions, How to Buy
- Overlay Text – Edit the text in quotation marks. To change the icons, visit Font Awesome, click the icon you want, copy the fa-name, and update the icon name below.
- Overlay Icon Color – Changes the icon color.
- Overlay Icon Background Color – Changes the icon background color.
d. Sale Overlay
Use this overlay to promote current sale promotions and promo codes. This overlay appears when the button above the beat player is clicked.
- Show “Sale” Button in Beat Sort Bar
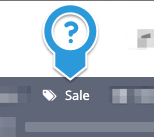
- Sale Button Text – Limit text. Example: Sales, Promotion, Discounts
- Overlay Text – Edit the text in quotation marks.
- Overlay Text Color
- Overlay Text Background Color
- Overlay Background Image

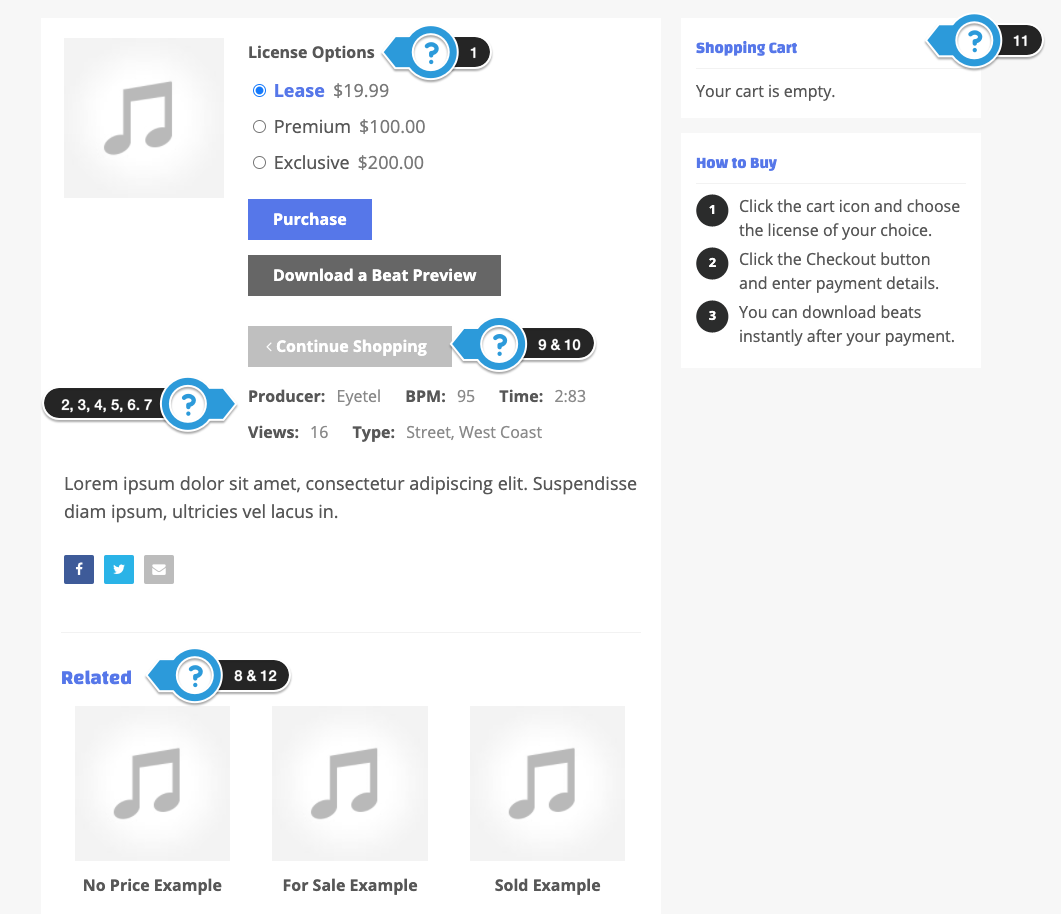
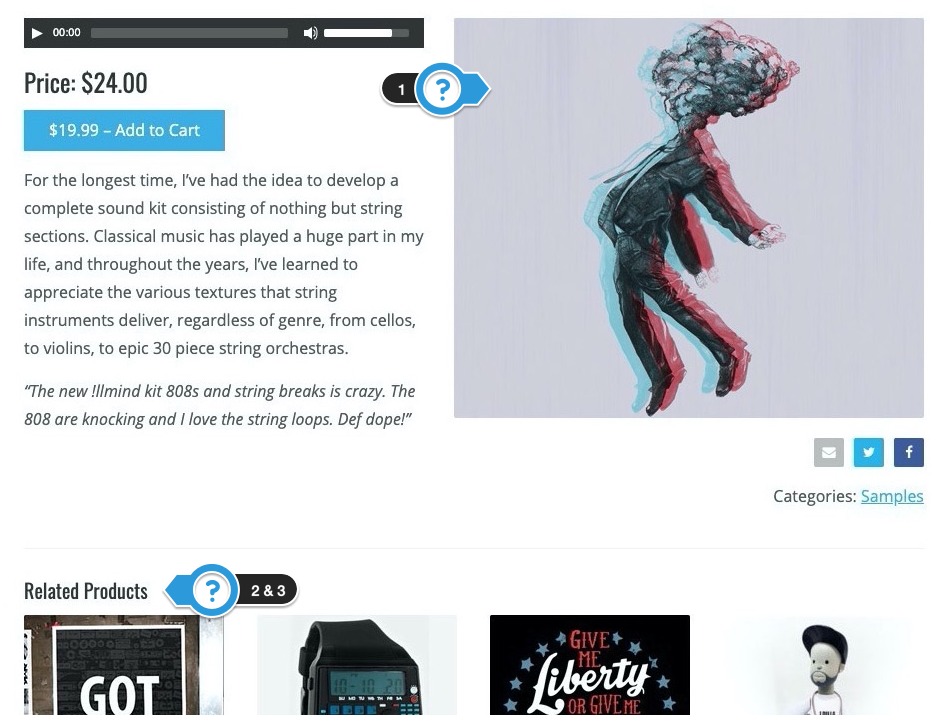
3.4 Single Beat Page ( Panel )
a. Single Beat Page Settings
Settings for the single beat page.
- Text Above License Options
- Automatically Start Player
- Show Producer
- Show BPM
- Show Time
- Show Page Views
- Show Type
- Show Related Beats – Beats load randomly.
- Show the Continue Shopping button – Must include button text below.
- Continue Shopping Button Text – Enter the text to appear in the button. Example: Continue
- Single Beat Page Sidebar – Show Sidebar / Hide Sidebar
- Related Beats Text
b. Audio Player
- Select Audio Player – Audio files need to be on your server for the Soundwave audio player to work. The Soundwave player will not work with demo content, add your own beats for it to work.
- Soundwave Progress Color
- Soundwave Color
- Soundwave BG Color

4. Colors & Fonts
Customize your website’s fonts & colors. Preview fonts at Google Web Font Directory.
4.1 Website Title Font
- Website Title & Header Fonts – Setting for the name, frontpage titles, page titles, and widget title.
- Page & Widget Title Color – Changes the page and widget title color.
- Font Weight – Adjust the boldness of the font.
4.2 Button Settings
- Accent Color: Button & Link Color – Select your button and link color. Do not select white.
- Button Font Weight
- Button Style

4.3 Body General Font
- Body Font – Font for body text, buttons, and text inside widgets.
- Body Font Size – Changes the body and widget font size.
- Body Text Color – Changes the body and widget text color.
4.4 Website Background Color
- Remove the background color and padding from the content container & widgets.
- Border Line Color – Changes the borderline color for page titles, widgets, and more.
- Content Background Color – Changes the color of the main content box and sidebar widgets.
- Website Background Color – For this color to appear, you can not have a background image or pattern.
4.5 Navigation Font
- Navigation & Beat Name Font – Font for the navigation, beat name, and the beat sort bar.
- Font Weight – Adjust the boldness of the font.

4.6 Widgets
- Widget Header Font Size (px) – Changes the sidebar widget title size.
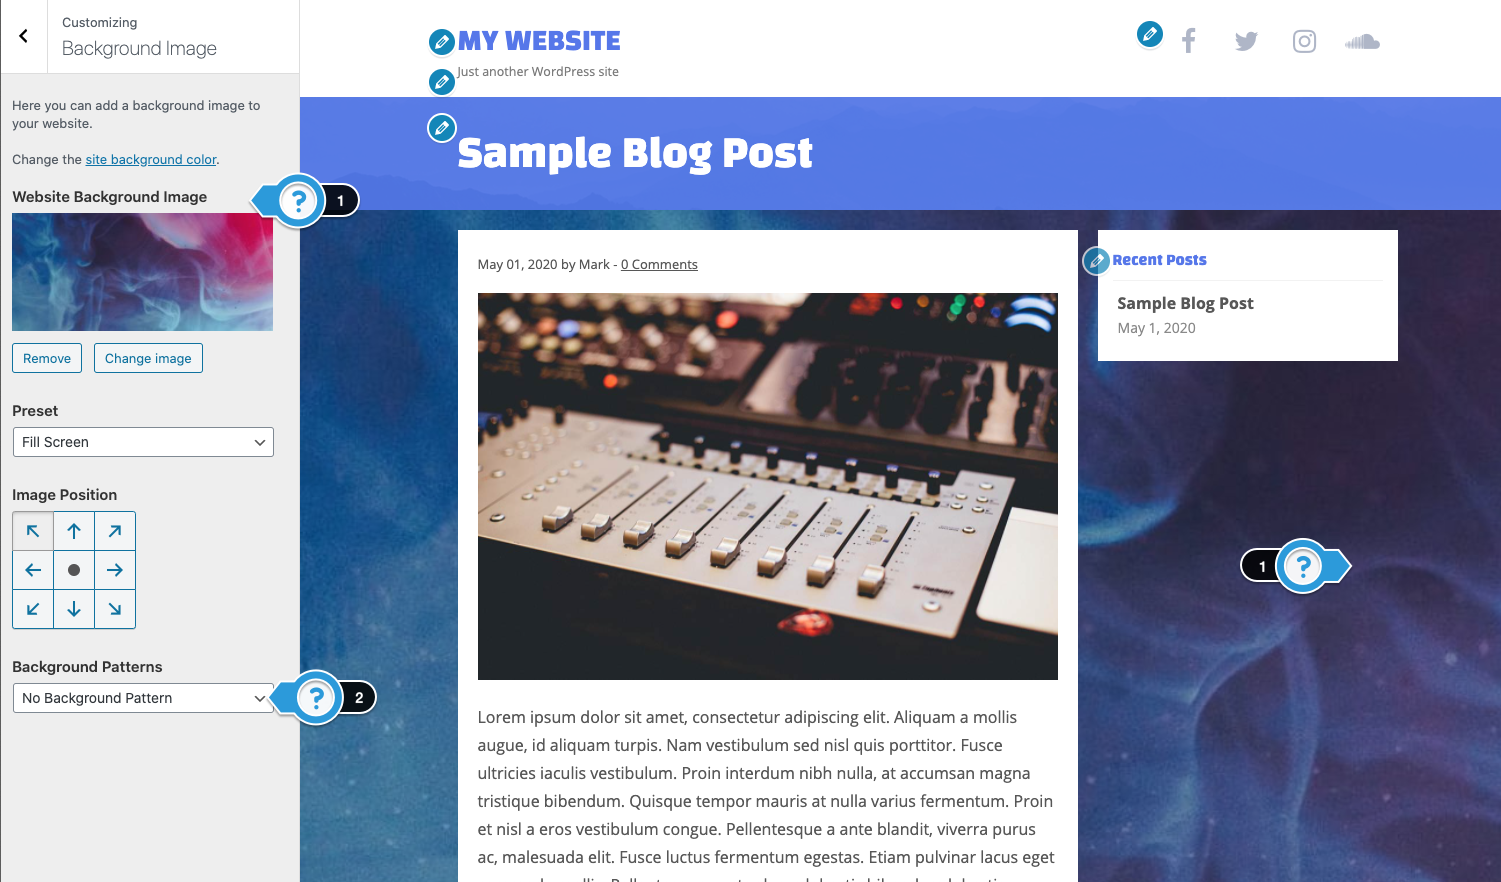
5. Background Image
Here you can add a background image to your website.
- Website Background Image
- Background Patterns
6. Pages & Blog
Edit settings for static pages and blog.
6.1 General Sidebar
- Sidebar Position: Left or Right
- Hide Sidebar on Mobile
6.2 Page Title Styling
The page title is the title that appears at the top of the page, like the page name and blog title.
- Page Title Settings – Default / Fullwidth Title
- Fullwidth Title Text Color
- Fullwidth Title Background Color
- Fullwidth Title Background Image
- Fullwidth Image Color Tint – Apply a color tint over the background image.
- Title Background Image Settings – Stretch / Repeat
- Fullwidth Title Font Size
- Fullwidth Title Padding
- General Page Animation – Setting for static pages, beat pages, blog posts, and full-width templates.
6.3 Blog Settings
Settings for blog home and single posts.
Blog Homepage
- Hide Sidebar – This hides the sidebar on the blog homepage.
- Hide Author & Date
- Animation – Animates blog posts.
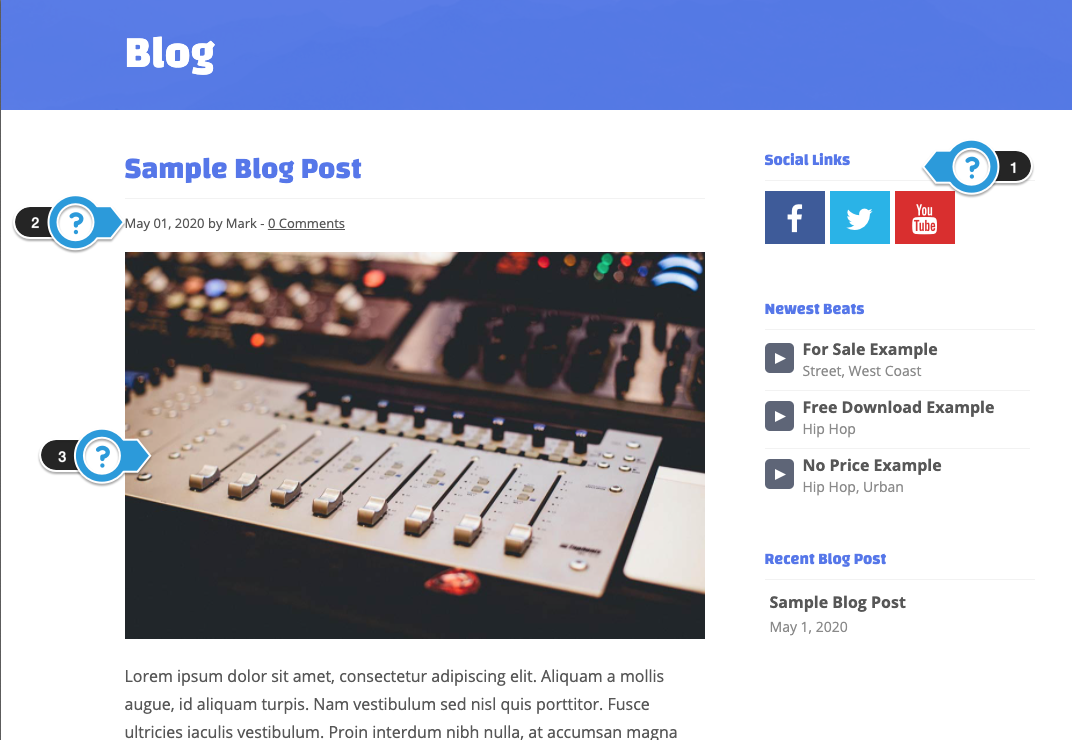
6.4 Single Blog Page
- Hide Sidebar
- Hide Author & Date
- Show Social Share Buttons – Display social buttons on single beats, articles, and product pages.
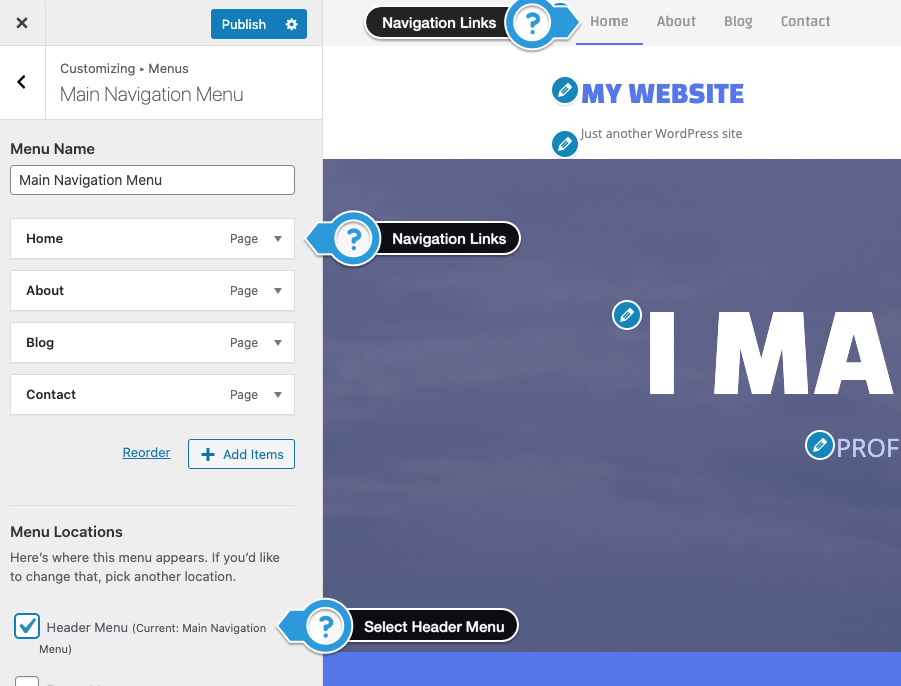
7. Menus
Edit the header and footer navigation menu.
8. General
Edit general settings for tracking analytics, photo, and video gallery templates.
8.1 Google Analytics
Add the website tracking code from Google Analytics or another service. The tracking code should include a script tag.
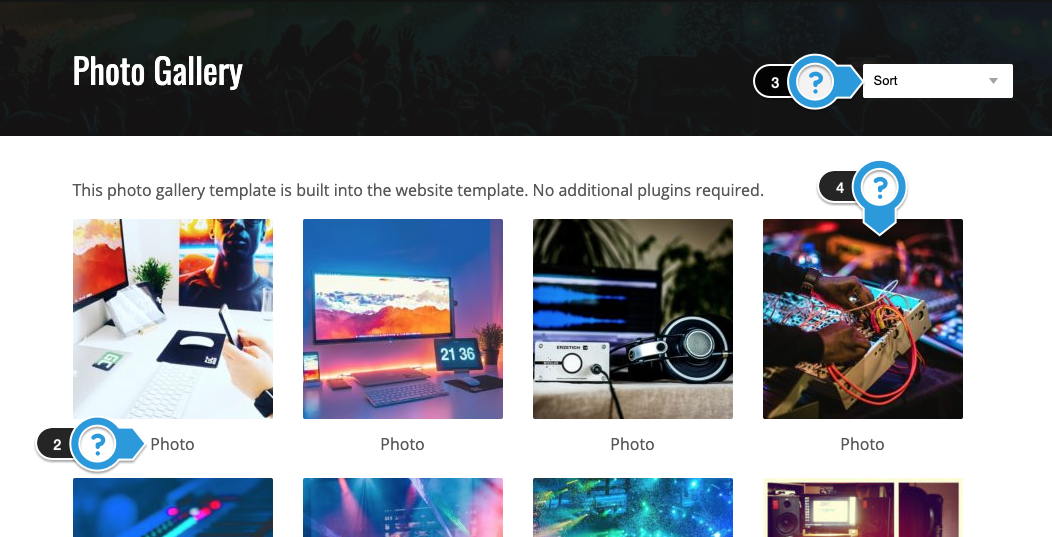
8.2 Photo Gallery
Settings for the photo gallery template.
- Select Photo Gallery Homepage – Select the page you created the photo gallery. This will link the “All” option in the sort drop-down menu.
- Hide Photo Name
- Hide Sorting Drop Down Menu
- Image Animation – Control how images are loaded on the page.
- Hide Sidebar
- Hide Author & Date
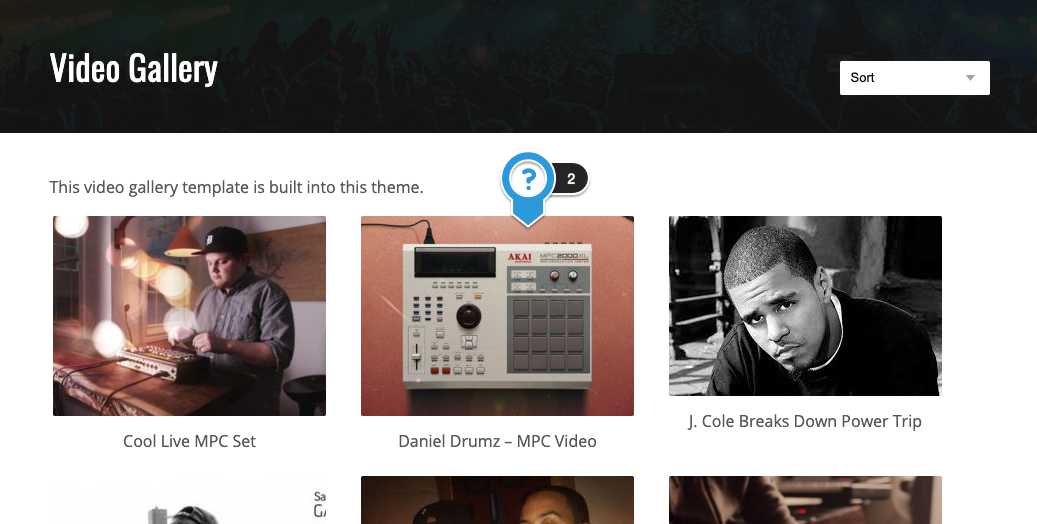
8.3 Video Gallery
Settings are for the video gallery template.
- Video Gallery Homepage – Select the page you created the video gallery. This will link the “All” option in the sort drop-down menu.
- Video Gallery Animation – Animates the video thumbnails.
9. Product Store
9.1 Product Store Settings
If you sell physical products, fill in the info below. You must have a PayPal account to use the product store.
- PayPal Email Address – Enter the email address connected to your PayPal account.
- Currency – Enter your currency. The default currency displayed is American dollars (USD). Example currencies: EUR, GBP, AUD. Here is a list of PayPal allowed currencies.
- Currency Symbol – Enter the currency sign. The dollar sign is the default $. Examples: $, £, €. List of currency symbols.
- Select Store Homepage – Choose the page you created the store homepage. This will link the “All” option in the sort drop-down menu.
- Select Store Success Page – Create a static thank you page and select here to redirect the user to once the payment is made in your product store.
9.2 Store Homepage
- Banner Image – Suggested image size: 900×300
- Store Homepage Animation – Animates the images in the product store.
- Hide Sorting Drop Down Menu
9.3 Single Product Page
- Product Image Position – Left / Right
- Show Related Products – Show / Hide
- Related Products Text
- Store Single Page Animation – Animates the single product container.
9.4 Single Product Page Preview
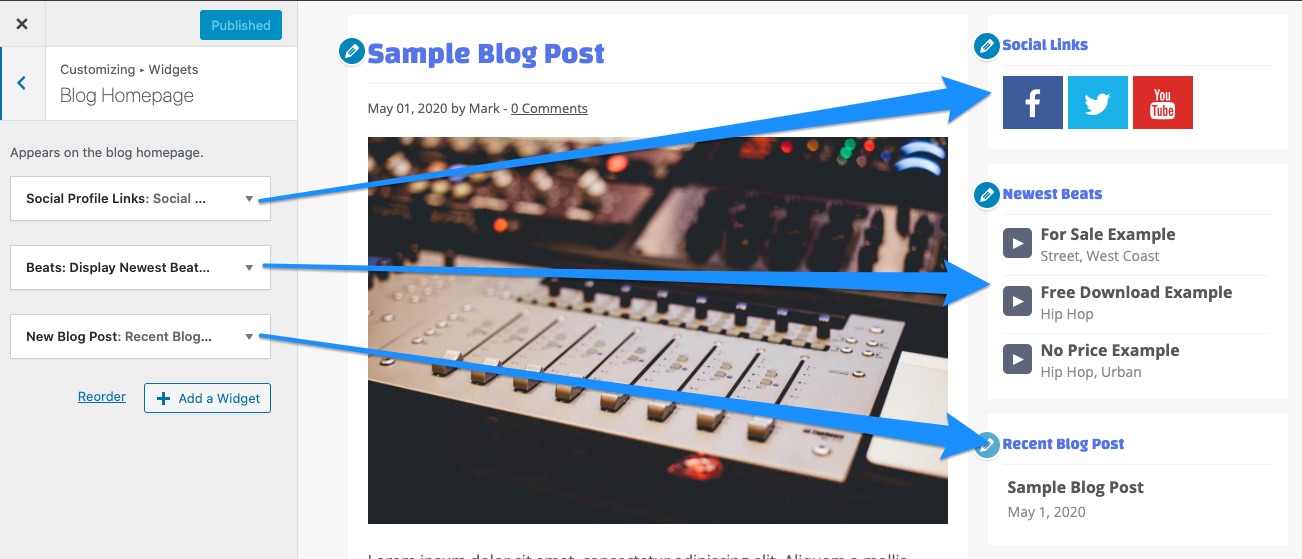
10. Widgets
Add and remove sidebar widgets and frontpage sections.
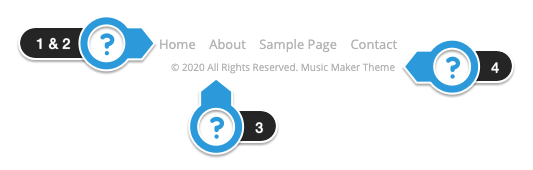
11. Footer
Here you can edit the settings for the footer that appears at the bottom of your website
11.1 Footer Options
- Footer Menu Location – Align left or center the footer menu.
- Displaying a Footer Menu – Once you create a footer menu, you must select Footer Menu under Menu Locations on the Menus page.
- Footer Menu Text Color
- Copyright Text
- Hide Music Maker link
11.2 Footer Widgets
- Show Footer Widgets – To show the footer widgets, you need to enable “Show Footer Widgets”
- Footer Widget Background Color – You must select show footer widgets above.*
- Remove Widget Area Background – This will remove the background color.
- Footer Widget Title Color – Update the widget title color.
- Footer Widget Text Color
- Footer Widget Link Color
- Footer Widget Border Color – Changes the footer border color.

12. Homepage Settings
These are the general homepage settings.
12.1 Homepage Banners
These are for the settings for the banner post type that appears above the Beat Store Playlist template.
These banners are not connected to the Frontpage Sections Template.

12.2 Homepage Display
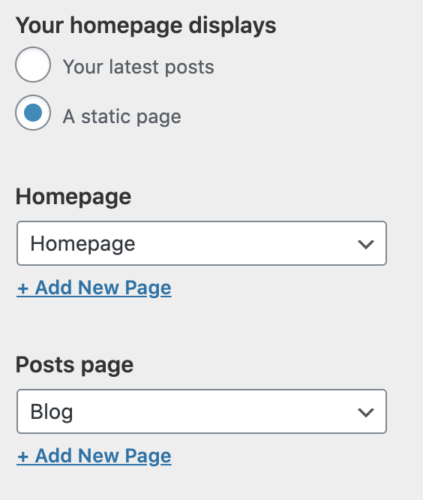
Here you can select what appears on your website homepage.
By default, WordPress displays the blog homepage and the latest blog articles.
If you would like to display a static page:
- Select “A Static Page”
- Under “Homepage” select the page you want to appear on your homepage.
- Create a Static Page named Blog
- Under “Posts Page”, select the “Blog” page you created
13. Custom CSS
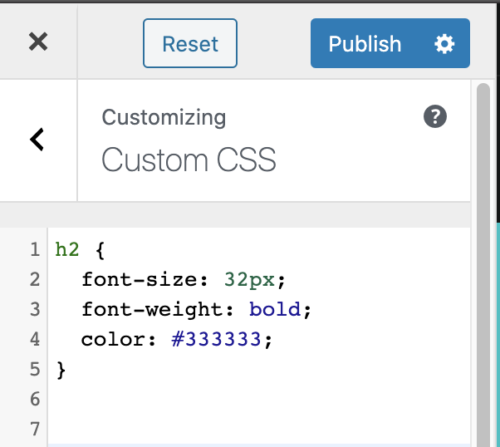
Here you can add custom CSS code to customize the appearance and layout of your site.
You must enter valid CSS code. If you don’t, it can break your website.
Troubleshooting & Notes
- Cache Plugin Problems
- If you are using a cache plugin, please clear your cache and deactivate it to avoid problems.
- The names for the different panels and options may have changed.
- The WordPress Customizer replaced the Theme Options settings in version 2.18.
Need Help?
1. Try searching for answers. Try searching different terms if you can't find a answer. 2. Try troubleshooting if something is not working.
3. If you can't find answers, click to leave a comment. Provide website links and detailed information.