Your website’s navigation menu is crucial for user experience, allowing visitors to easily find their way around your content. This article provides a comprehensive guide on how to add and customize the navigation menu in your Music Maker theme.
Navigation Menu – Overview
The navigation menu allows your website visitors to easily navigate to different pages on your site. You can customize the appearance of your navigation menu colors using the WordPress Customizer.
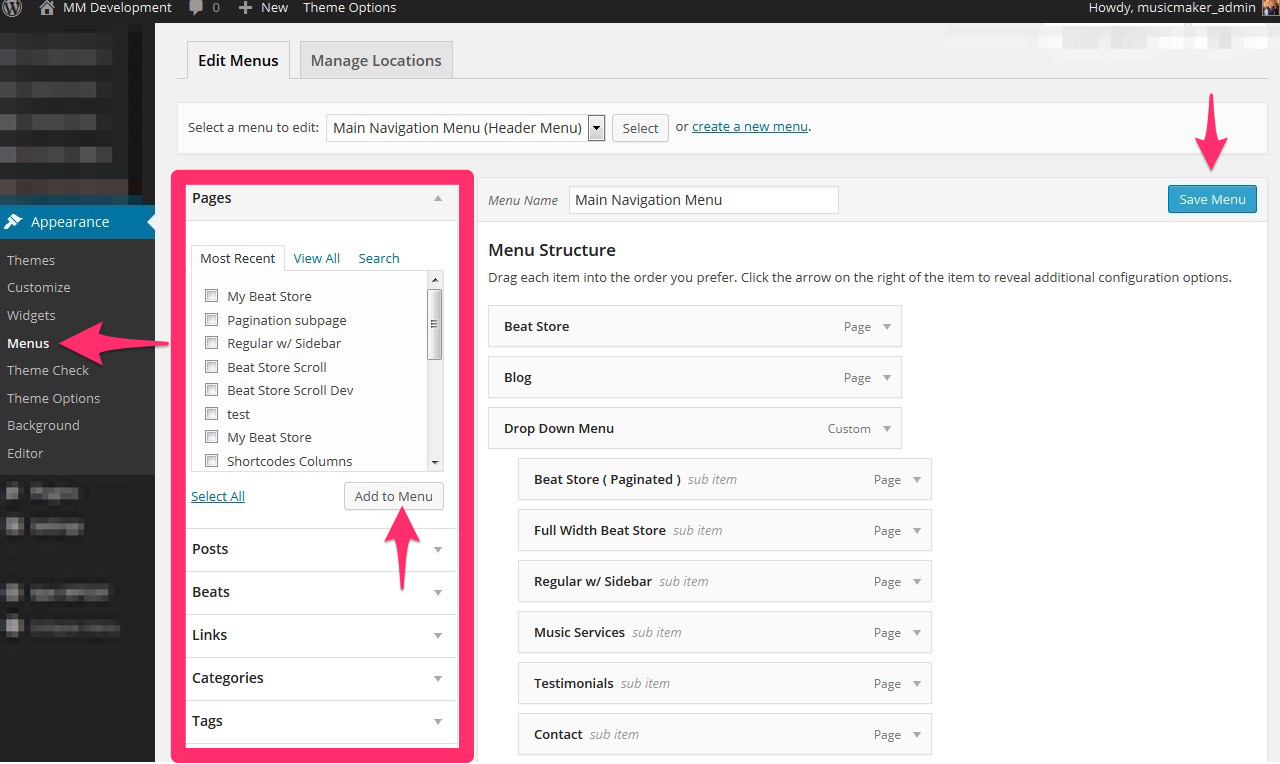
- In your WordPress admin panel, go to Appearance > Menus.
- Start by creating a new menu in the panel on the right. Enter a name for your menu (e.g., “Main Navigation”) and click the Create Menu button.
- On the left side, you’ll see panels for Pages, Posts, Categories, and Custom Links. Select the items you want to add to your menu and click Add to Menu.
- The selected items will appear in the menu structure on the right. You can reorder the menu items by dragging and dropping them. To create submenus (drop-down menus), drag a menu item slightly to the right under a parent item.
- Once you have arranged your menu items, you need to assign the menu to a location. Under Menu Settings at the bottom of the menu structure, check the box next to Header Menu (or the desired location, as your theme might offer other options).
- Click the Save Menu button..
Below are general videos on editing your navigation menu in WordPress.
Adding Pages to the Navigation:
Whenever you publish a new static page on your website, you will need to manually add it to your navigation menu if you want it to appear there. Simply follow the steps above to select the newly created page from the Pages panel and add it to your menu.
The pages you select will be transferred to the right side of the page in the navigation box.
You can then reorder and create submenus by dragging the menu items. When you’re finished, click the Save Menu button.
How to Edit the Menu Location
You can change where your navigation menu appears on your site using the WordPress Customizer:
- In WordPress, click Customize under Appearance on the sidebar
- Click Header > Menu Location
- Click the Select Image button under Logo Image.
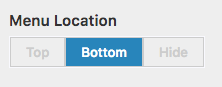
- Select your choice under Menu Location.
- Click the Save & Publish button.
Add Shopping Cart Link to Navigation
Here are the steps to follow to add a shopping cart link to your header menu.

Important Note: You can not use the WP Menu Cart Plugin while using a cache plugin because the cart number will not refresh when items are added to the shopping cart.
Install the WP Menu Cart Plugin
- In WordPress, click Add New under Plugins on the sidebar.
- In the “Search plugins” box at the top right of the page,e enter WP Menu Cart and hit enter on your keyboard.
- Click Install Now. Then click Activate Plugin.
- WordPress, click Menu Cart Setup under Settings on the sidebar.
- Select the menu in your header and select any other settings you desire.
- Click the Save Changes button.

How to Select Your Main Navigation Menu
You may need to select your main navigation menu if you have imported one of the demo styles and all of the website links are showing.
- In WordPress, click Menus under Appearance on the sidebar.
- Next to “Select a menu to edit”, select the main navigation of the menu you want to edit and click Select.

- Under Menu Settings, check the Header Menu and click Save Menu.

How to Link to Sections on the Front Page Template
Here are the steps to link to one of the sections on the Frontpage Sections Template.
- In WordPress, click Menus under Appearance on the sidebar.
- Click the Custom Links box.

- For the URL input, enter the web address to your front page template. This might be your homepage.
- Example URL: http://your-domain-name.com/
- Add to the end of the web address the ID name to the section you would like to link to on your front page.
- Example URL to link to beats: http://your-domain-name.com/#beats
- Section IDs:
- #beats
- #license ( Pricing Table )
- #services
- #products
- #video
- #blog
- #contact
- #about
- #photos
- Text 1 – #t1
- Text 2 – #t2
- Text 3 – #t3
- Text 4 – #t4
- Text 5 – #t5
- #credits ( Production Credits )
- Enter the name of the link in the Link Text input.

Example Custom Link:- URL: http://demo.musicmakertheme.com#beats
- Link Text: Beats
- Click the Add to Menu button.
- Click the Save Menu button.

Add Beat Sorting Links to Menu
If you would like to add options to sort beats by Genre, Tags, Categories, or Price in your navigation menu, follow these steps.
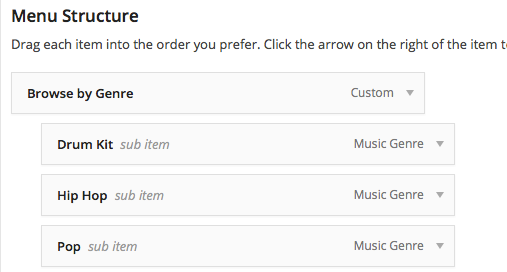
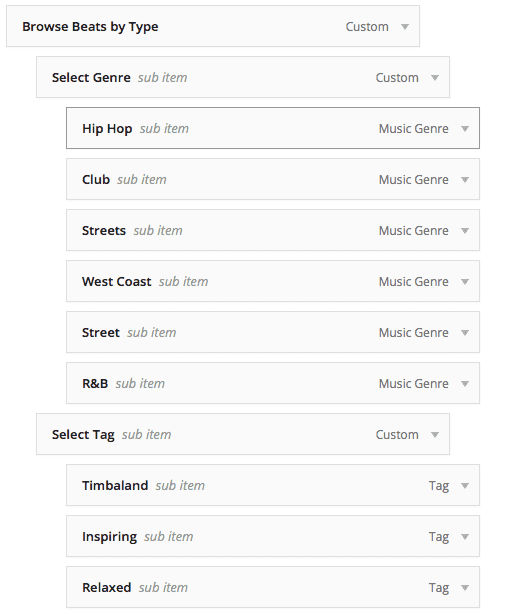
Here is an example of what you will get in the menu:

Jump to the 2:00 mark to hear about adding the beat sorting links.
IMPORTANT: Before you follow the steps below, make sure you have created some Genres, Tags, or Categories and have added beats to them.
- In WordPress click Menus under Appearance on the sidebar.
- At the top right of the page, click the Screen Options tab and check Music Genres, Download Tags, and Download Categories.

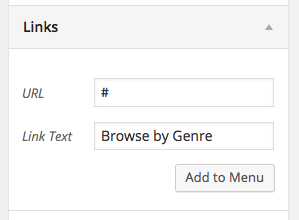
- On the left side of the page, click Links. Enter # as the URL and name the main link whatever you want ( Example: Browse by Genre ) and click Add to Menu.
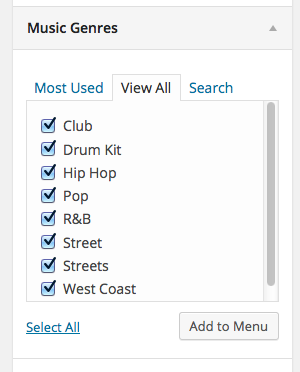
- Now on the left side of the page click Music Genres. Select all the music genres you would like to appear in the navigation and click Add to Menu.
- All the menu links will now be added to the menu.
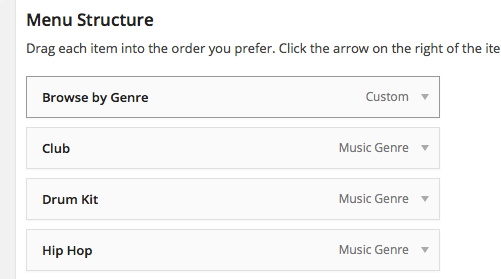
- Now that all of the links have been added to the navigation, you need to stack the music genres under the main “Browse by Genre” Link. Do this by dragging and dropping the link under the top link.
- If you want to make the menu more complex do the same thing with Download Categories and Download Tags.
- Next click the Save Menu button at the bottom right of the page.

How to Center the Navigation Menu
Add the CSS Code below. How to Add CSS.
@media (max-width:3000px) and (min-width:881px) {
/* Main Nav */
ul.topnav { text-align: center;  }
ul.topnav li {  float: none;   display: inline-block; }
ul.topnav li ul li {  float: left; display: inline-block; }
/* For WPcart Menu Plugin */ #wpmenucartli { display: inline-block; float: none !important; }
}
CSS Tips & Tricks
Here is a mix of CSS code for the navigation menu. How to Add CSS.
Change the dark grey #333333 to what ever color you want. You can use the color picker at colorpicker.com to get the color you want.
.navigation_holder { background-color: #333333;}
This code works for the Music Maker theme 2.12 and above. Change the 18px to what ever size you want.
/* Navigation Font Size */
.topnav a { font-size:18px !important;}
/* Navigation Font */
ul.topnav li  a  {  font-family:'PT Sans' !important;}
By default, the Music Maker theme uses the PT Sans Google Font. If you change it to another font, modify the code above with your new font name to update the font in your navigation.
The spelling and spacing of the font must match exactly to work.
/* Navigation All Caps */
ul.topnav li { text-transform:uppercase; }
Change the #ffffff to the color you want.
/* Navigation Link Color */
ul.topnav li a { color: #FFFFFF !important;  }
/* Docked Nav Bar */
.navigation_holder , .logged-in .navigation_holder {  position: fixed; z-index: 1030; top: 0; }
.logged-in .navigation_holder {  margin-top: 32px; }
body { padding-top: 43px; }
The CSS on this page will dock your navigation menu to the top of your site and will remain docked to the top as you scroll up and down your website.
Code tested in Firefox, Chrome, and Safari on a Mac.
Please note: The mobile menu with this code is a little buggy if you have a lot of links in your navigation. Test out your navigation on mobile when using this code.
/* Hide Menu */
.navigation_holder { display: none; }
Related FAQs
Why can’t I see the “Menus” option under “Appearance” in my WordPress dashboard?
The “Menus” option appears after at least one page has been created on your website. Make sure you have created and published some pages before trying to create a menu.
How do I create a drop-down menu (submenu)?
To create a drop-down menu, drag a menu item slightly to the right and place it directly below a parent menu item in the Appearance > Menus section. This indented item will then appear as a submenu under the parent item on your website.
The links in my navigation menu are not working. What could be the problem?
Double-check that you have saved your menu after making changes and that the menu is assigned to the correct location (Header Menu or other appropriate location) under Menu Settings. Also, ensure that the URLs for any Custom Links are entered correctly. If you recently updated your theme, you might need to re-select your main navigation menu under Appearance > Menus.
Can I change the font or colors of my navigation menu links?
Yes, you can customize the colors of your navigation links in the WordPress Customizer under Appearance > Customize > Header > Colors. The theme’s documentation might provide CSS snippets for more advanced font customizations. You can add custom CSS under Appearance > Customize > Custom CSS.
I’ve added a shopping cart link to my menu, but it’s not showing the number of items in the cart. Why?
If you are using a cache plugin, it might prevent the cart count from updating in real time when using the WP Menu Cart plugin. Consider disabling or configuring your cache plugin to exclude the cart page, or use the alternative method of adding a custom link directly to your checkout page without relying on a dynamic cart count.
Need Help?
1. Try searching for answers. Try searching different terms if you can't find a answer. 2. Try troubleshooting if something is not working.
3. If you can't find answers, click to leave a comment. Provide website links and detailed information.