Once you have set up the beat store, you will be ready to start adding beats.
If you experience any problems, visit the Beat Store FAQs and Beat Store settings overview.
There are four beat type options available:
- For Sale – This is used to sell beats at a single price or multiple license options.
- Free Download – Offer free beat downloads to your visitors.
- No Price – This can be used to negotiate beat prices.
- Sold – This is used to showcase your previously purchased beats.
Here are detailed instructions for each beat type:
1. How To Add Beats For Sale
Beats for sale can have multiple prices and license options.
Required Steps:
1. Click Beat Store on the WordPress sidebar.
2. Click Add New Beat.
3. Enter the Beat Name. (Required)
4. Select “For Sale” for Beat Type. (Required)
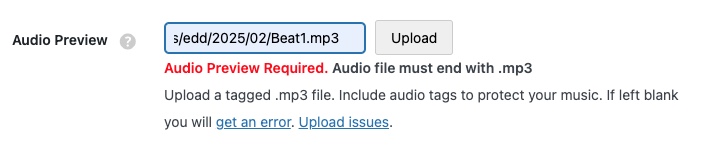
5. Upload an Audio Preview (Required)
- Click the Upload button and select your MP3 file from your computer.
- If you do not see the file URL in the file URL input, click the File URL button.
- Beats should include an audio tag.
- Check out this post if you are having problems inserting the audio file.
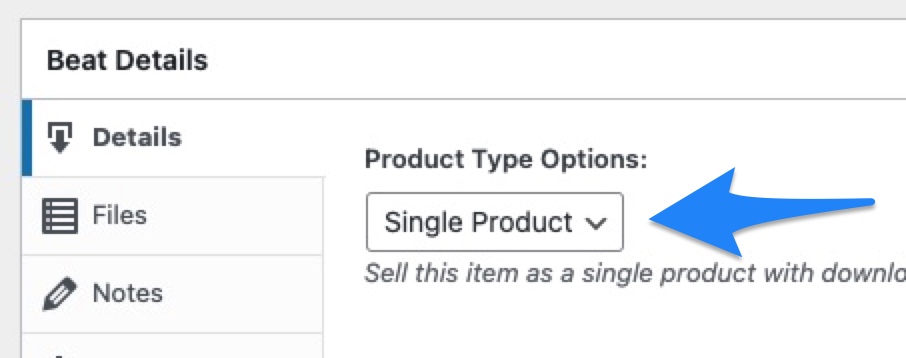
1. In the Beat Details box, under Product Type Options, select Single Product.
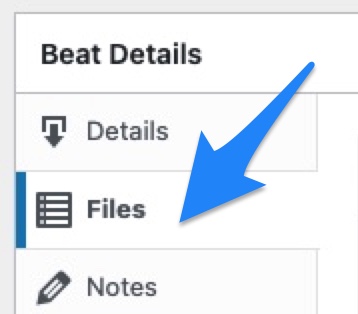
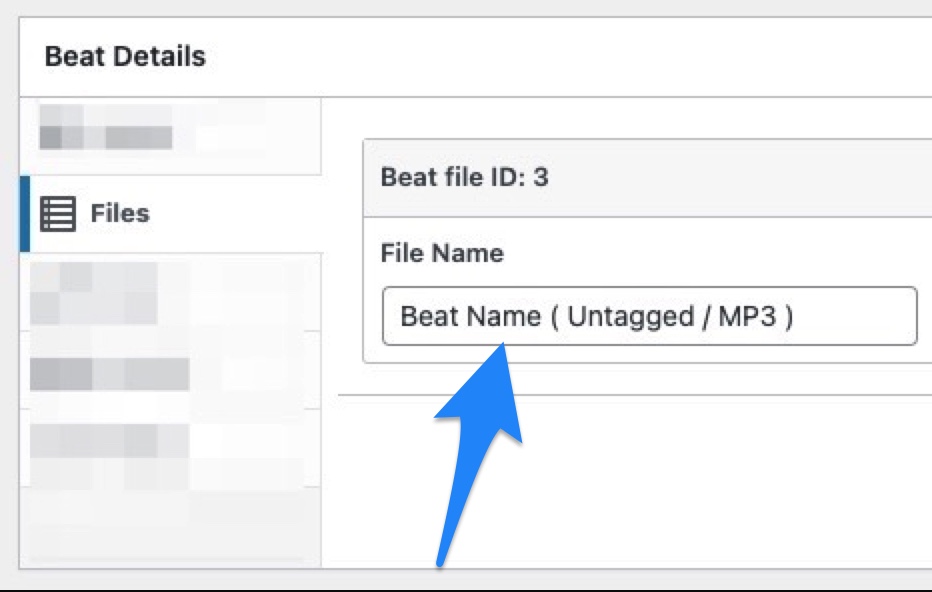
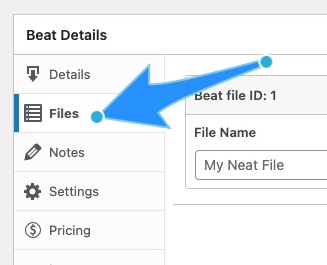
2. Click the Files tab in the Beat Details box.
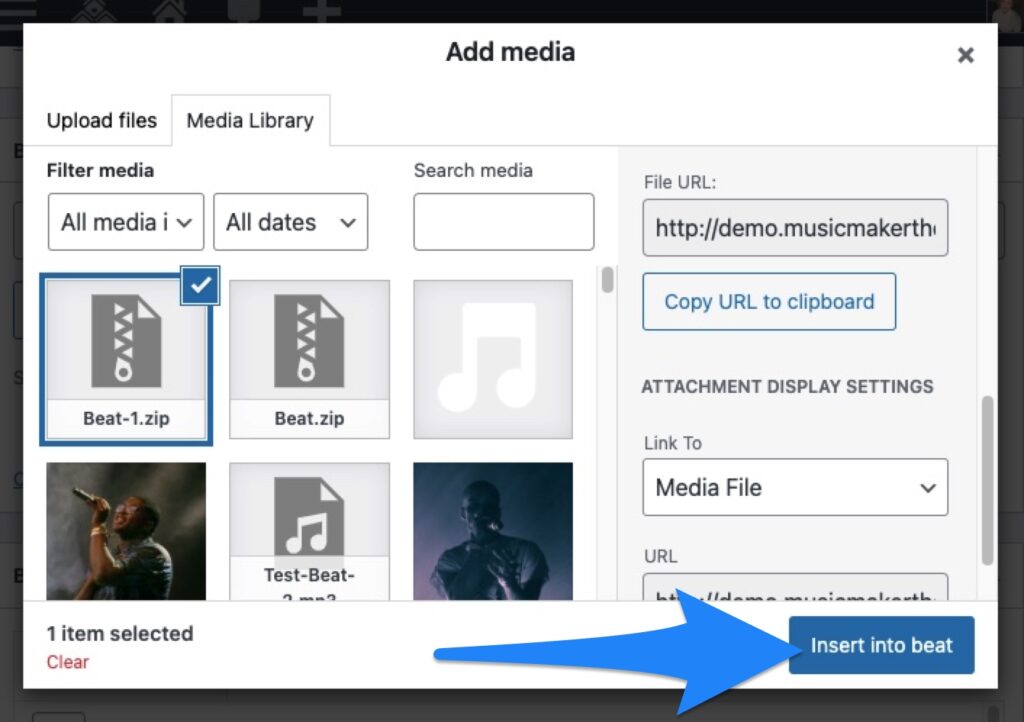
3. Click the Link icon next to the File URL input to upload the untagged beat.
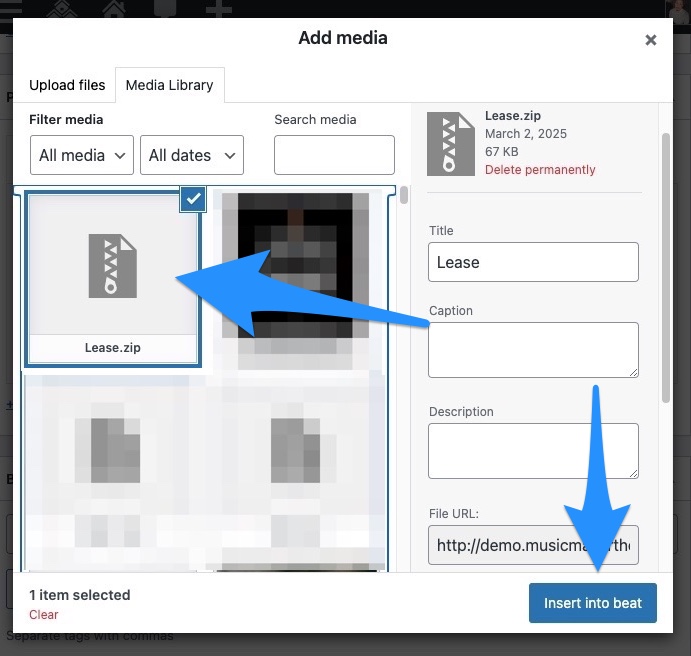
4. Drag the beat in a zip file into the overlay window and click the Insert Into Beat button.
- Put Beat Downloads In Zip Files – We highly recommend you put your beats in a zip file to help protect your server. If you do not put an MP3 in a zip file, when the customer tries to download the file, the MP3 file will play in the web browser, and they will have difficulty downloading it.
- The zip file can contain an MP3, WAV, project file, or PDF.
5. Update the file name in the File Name input.
Examples:
- Beat Name ( Untagged )
- Beat Name ( MP3 )
- Beat Name ( WAV )
- Beat Name ( Project Files )
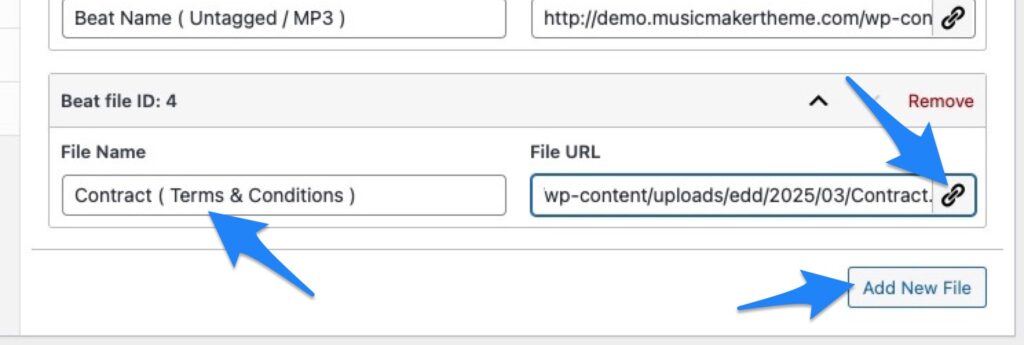
6. Optional: Include a PDF Contract With Beats
If you want to include a PDF file with your beat contract or terms and conditions, you can click the Add New File button, and upload a PDF file your customer can download when a beat is purchased.
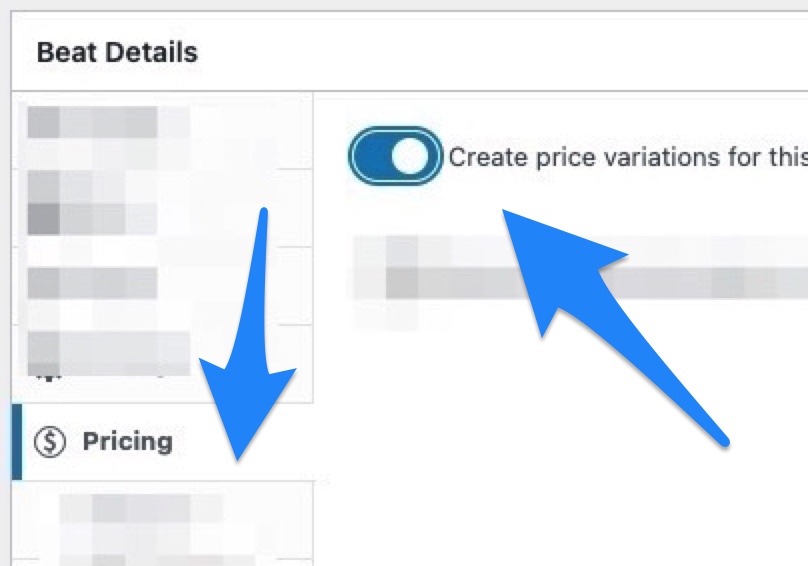
1. In the Beat Details box, under Product Type Options, select Single Product.
2. Click the Pricing tab and click Create price variations for this beat.
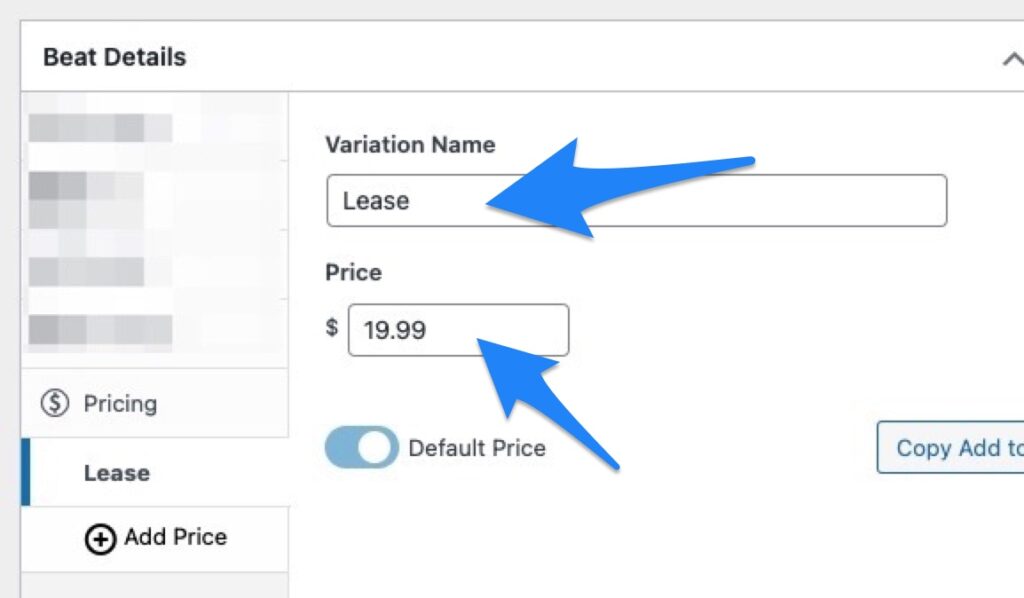
3. Click the Price ID: 1 Tab.
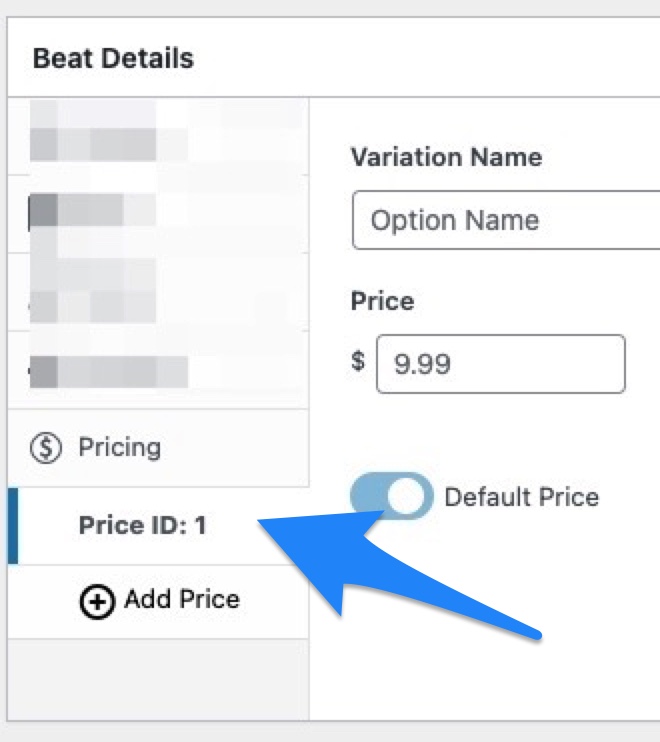
4. Enter the license name under Variation Name and the license price in the Price input.
Example: Lease – $19.99
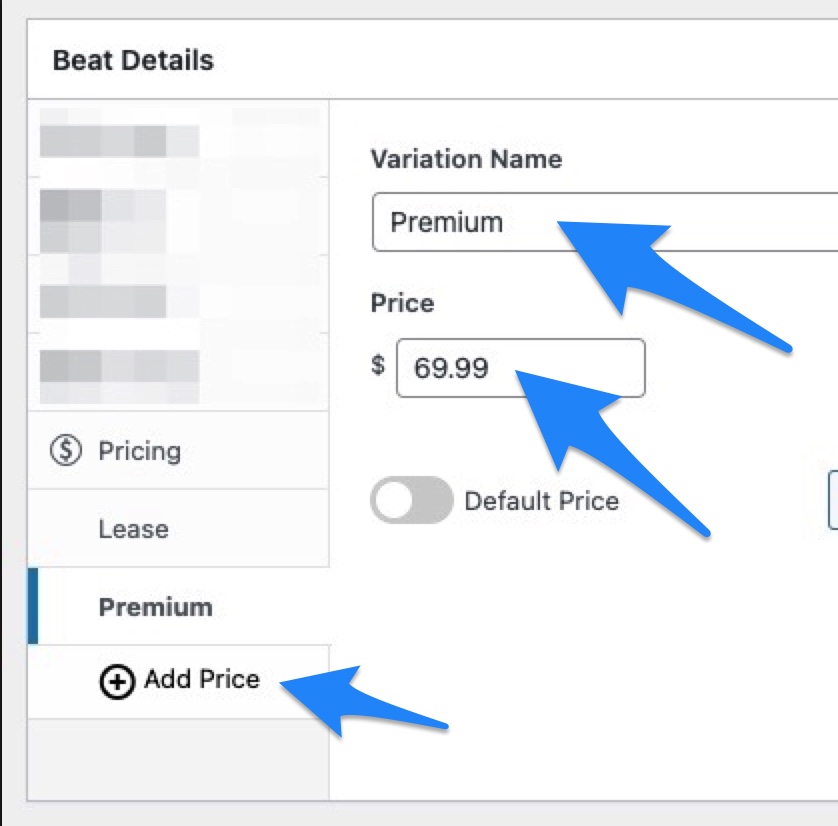
5. Click the Add Price tab. Then, add another license name and price.
Enter the license name in the Variation Name input and the license price in the Price input.
Example: Premium – $69.99
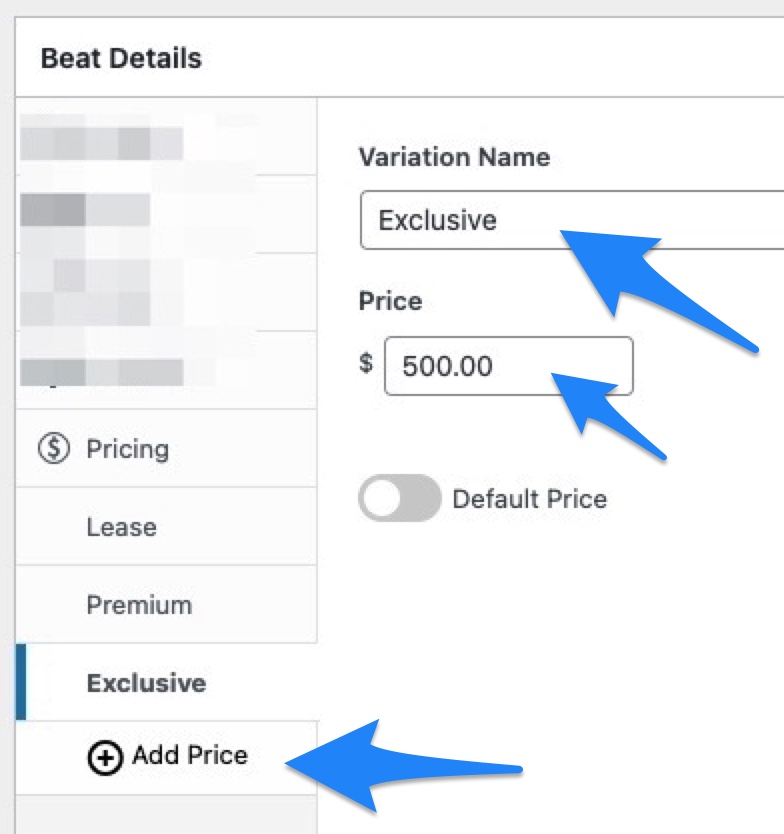
6. Click the Add Price tab. Then, add another license name and price.
Enter the license name in the Variation Name input and the license price in the Price input.
Example: Exclusive – $500.00
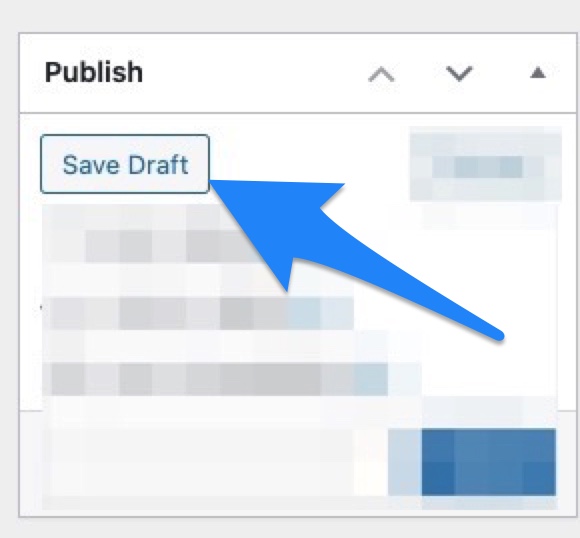
7. Click the Save Draft button.
8. Click the Files tab
Upload Lease Beat Option:
9. Click the Link icon under the File URL input. – Click the Select Files button to browse your computer for your beat, or drag the untagged beat into the overlay window.
– We highly recommend you put your beats in a zip file to help protect your server.

10. Drag the untagged beat into the overlay window and click the Insert Into Beat button.
– Upload the beat in Zip files.
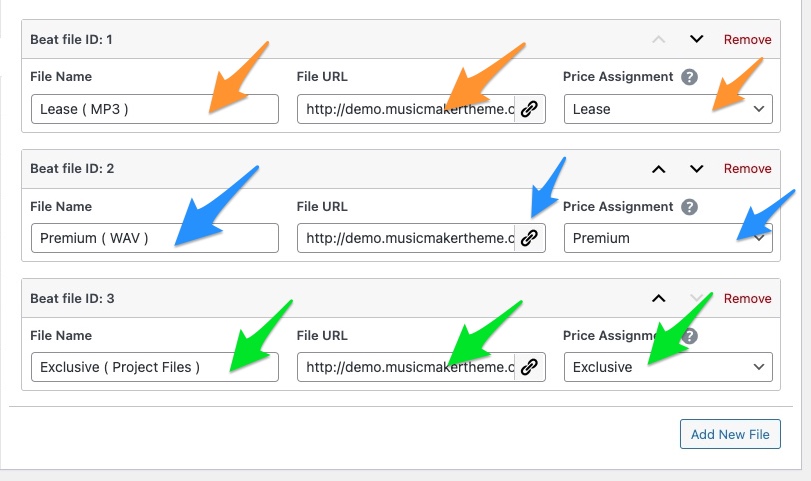
11. Update the File Name and select the correct license in the Price Assignment.
Example: Price Assignment: Lease

12. Click the Add New File button and repeat steps 9 to 11 for the remaining beats.
Example:
- Premium ( WAV ) – Include WAV file.
- Exclusive ( Project Files ) – Include project files.
13. Optional: Include a PDF Contract With Beats
If you want to include a PDF file with your beat contract or terms and conditions, you can click the Add New File button and upload a PDF file your customer can download when a beat is purchased.
Optional Details:
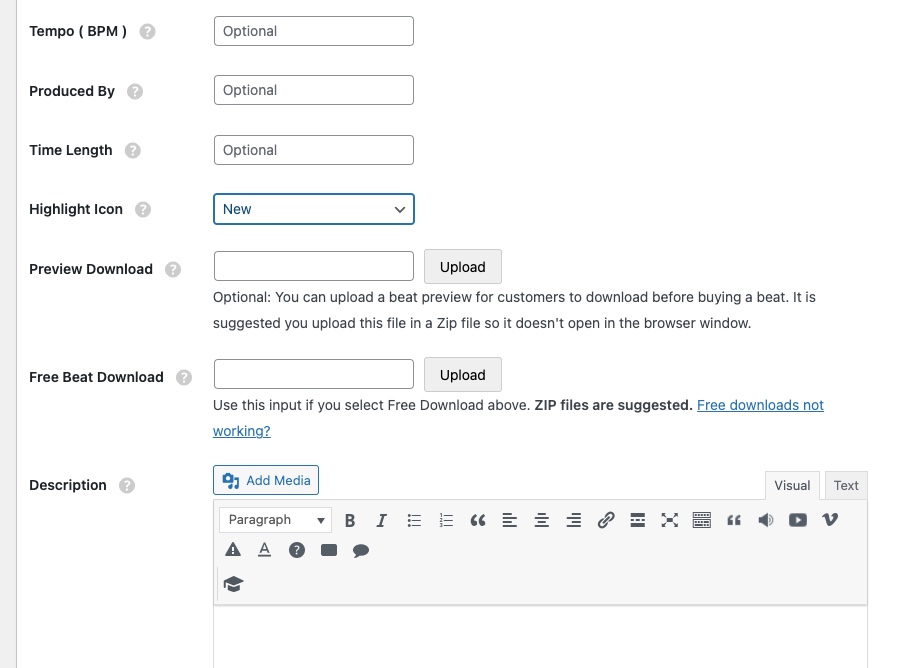
1. Tempo ( BPM ) – The number of beats per minute or tempo.
2. Produced By – Include a producer name.
3. Time Length – Enter the length of the beat.
4. Highlight Icon – Use an icon to highlight the beat in the beat player.
5. Preview Download – You can upload a beat preview for customers to download before buying a beat. You should upload this file in a Zip file so it doesn’t open in the browser window.
6. Free Beat Download – Use this input if you select Free Download above. ZIP files are suggested.
7. Description – Add details that will appear in the beat overlay window and single beat page.
8. Beat Thumbnail – Upload an image with 300 x 300 pixels dimensions via the Featured Image box.
Beat Sorting Options:
9. Music Genres – Classify the beat (e.g., Hip Hop, R&B, Pop, EDM).
10. Price Range – These are used for sorting beats.
11. Beat Categories – Sort beats into categories like “Free Beats”, “Beats with Hooks,” or “Beat Loops”.
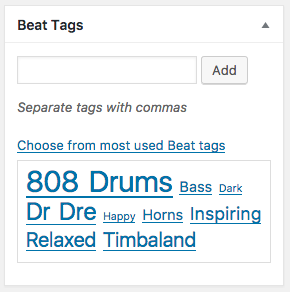
12. Beat Tags – Use tags to describe the beat’s mood, beat type, instruments, or feeling (e.g., Horns, Hype, Club, Bass Heavy).
13. SEO Meta Description – Improve search engine visibility.
14. Click the Publish or Update button to make your changes live.
2. How To Add Free Beats
This option allows you to give free beats to your visitors.
Required Steps:
- Click Beat Store on the WordPress sidebar.
- Click Add New Beat.
- Enter the Beat Name. (Required)
- Select “Free Download” for Beat Type. (Required)
- Upload an Audio Preview (Required) – Click the Upload File button and select your MP3 file. If the file URL isn’t visible, click the File URL button.
- Only MP3 files are supported.
- Upload the Free Download by clicking the Upload button. (Required)
- Upload the free beat in a zip file.

Optional Details:
- Tempo ( BPM ) – The number of beats per minute or tempo.
- Produced By – Include a producer name.
- Time – Enter the length of the beat.
- Description – Add details that will appear in the beat overlay window and single beat page.
- Highlight Icon – Use an icon to highlight the beat.
- SEO Meta Description – Improves search engine visibility.
- Beat Thumbnail – Upload an image with 300 x 300 pixels dimensions via the Featured Image box.
- Beat Sorting Options:
- Music Genres – Classify the beat (e.g., Hip Hop, R&B, Pop, EDM).
- Price Range – These are used for sorting beats.
- Beat Categories – Sort beats into categories like “Free Beats”, “Beats with Hooks,” or “Beat Loops”.
- Beat Tags – Use tags to describe the beat’s mood, beat type, instruments, or feeling (e.g., Horns, Hype, Club, Bass Heavy).
- Click the Publish or Update button to make your changes live.
Additional Info:
- To edit the free download text, go to Customize > Beat Store > Custom Text
- Related: Offer a Free Download & Collect Email Addresses
3. How To Add Beats w/ No Price ( Make an Offer )
The “No Price” option allows you to display beats with no price so visitors can make an offer. You can have an offer form appear in the overlay window or link to a specific page.
Required Steps:
- Click Beat Store on the WordPress sidebar.
- Click Add New Beat.
- Enter the Beat Name. (Required)
- Select “No Price” for Beat Type. (Required)
- Upload an Audio Preview (Required)– Click the Upload File button and select your MP3 file. If the file URL isn’t visible, click the File URL button.
Optional Details:
- Tempo ( BPM ) – The number of beats per minute or tempo.
- Produced By – Include a producer name.
- Time – Enter the length of the beat.
- Description – Add details appearing in the beat overlay window and single beat page.
- Highlight Icon – Use an icon to highlight the beat.
- SEO Meta Description – Improves search engine visibility.
- Beat Thumbnail – Upload an image with 300 x 300 pixels dimensions via the Featured Image box.
- Beat Sorting Options:
- Music Genres – Classify the beat (e.g., Hip Hop, R&B, Pop, EDM).
- Price Range – These are used for sorting beats.
- Beat Categories – Sort beats into categories like “Beats with Hooks” or “Beat Loops”.
- Beat Tags – Use tags to describe the beat’s mood, beat type, instruments, or feeling (e.g., Horns, Hype, Club, Bass Heavy).
- Click the Publish or Update button to make your changes live.
Additional Info:
- To edit the text for the “No Price” option, go to Customize > Beat Store > Custom Text
4. How To Update Beats To Sold
If you have sold a beat exclusively that can no longer be sold, you can update the status of the beat to “Sold” to keep it in your beat store, but remove the option to buy it.
Required Steps:
- Click Beat Store on the WordPress sidebar.
- Click the title for the existing beat you want to change to “Sold”.
- Select “Sold” for Beat Type in the beat details box.
- Click the Update button to make your changes live.
Additional Info:
- To edit the sold text, go to Customize > Beat Store > Custom Text
To manage your existing beats, click “Beat Store” or “All Beats” on the sidebar menu. You can use the Screen Options tab at the top right of the edit page if you are missing certain input boxes. Remember to clear your browser cache after making changes to ensure they are visible on your live site. If you encounter issues with uploading files, it may be due to your website host’s upload limit. Consider uploading large files via FTP and then adding the file URLs in the beat settings.
5. Beat Preview Download (Optional)
The “Preview Download” option offers a preview of the beats you sell. When you upload a Preview Download, a button will appear in the beat store overlay window and on the single beat page.
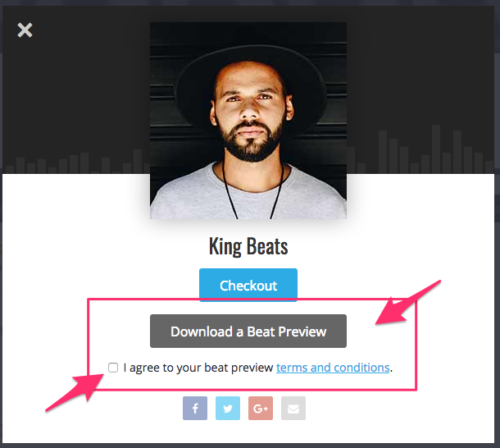
You can also add a required checkbox and text that visitors must agree to before they can download the beat preview file.
Instructions:
1. When you add a beat to the beat store, upload your beat preview ( in a zip file ) to the Preview Download input. Upload your beat preview in a ZIP file in the Preview Download input.

How to Edit the Preview Download Button Text & Terms:
1. Go to Customizer > Beat Store > Custom Text > Beat Preview Download
2. You can edit and replace the sample text. If you want to use the existing text, edit the # in the sample text with the URL to a static page you create with the terms and conditions of your beat previews.

Beat Preview Notes:
- The required checkbox option does not appear by default. You must turn it on in the WordPress Customizer.
- Put your MP3 files in a ZIP file because MP3 files will play in the browser and not download.
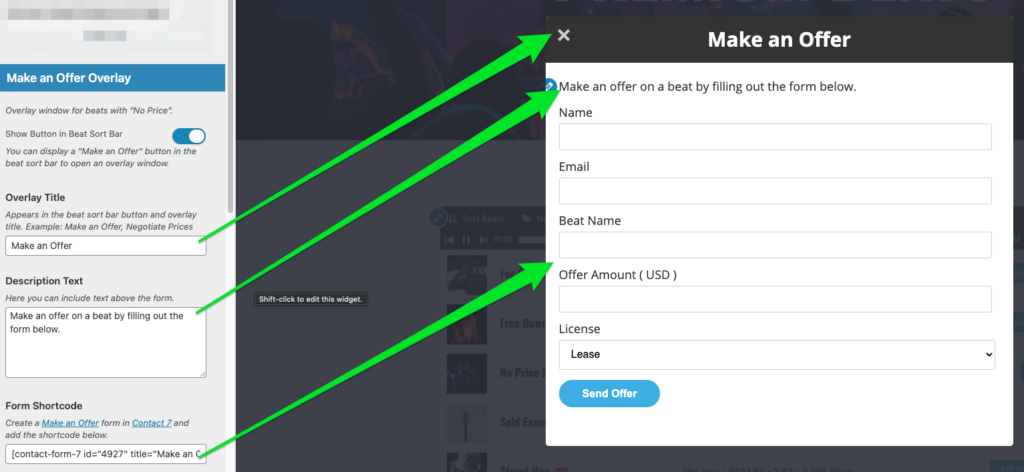
6. Make an Offer Overlay Window
A “Make an Offer” form can appear when a visitor clicks the Make an Offer button.
Video Preview
How it Works
- The user clicks the “Make an Offer” button in the beat player.
- The user clicks the Make an Offer button.
- Then, the user can submit a form to make an offer.
How to Add the Form
1. Create a Make an Offer Form if you did not import the sample content.
2. Once you create the form, copy the shortcode and open the WordPress Customizer.
3. Go to Beat Store Settings > Overlay Window Settings > Make an Offer Overlay
4. Add the Form Shortcode.
5. Under Customizer > Beat Store Settings > General Settings > No Price Button Text, you can edit the “No Price” button settings, which are used to display the Make an Offer button.
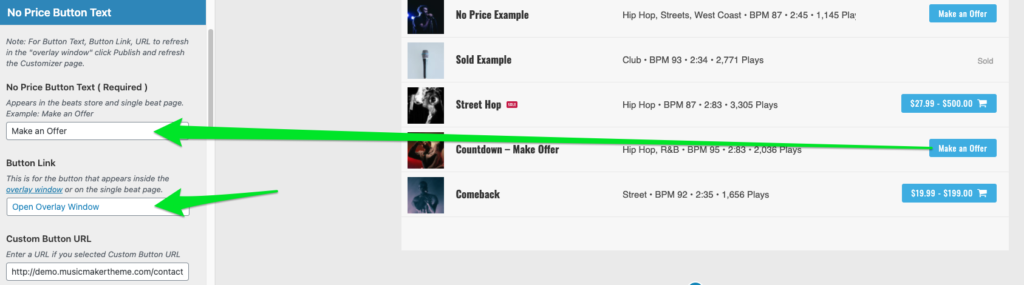
6. Now add beats with “No Price“, and the Make an Offer option will appear.
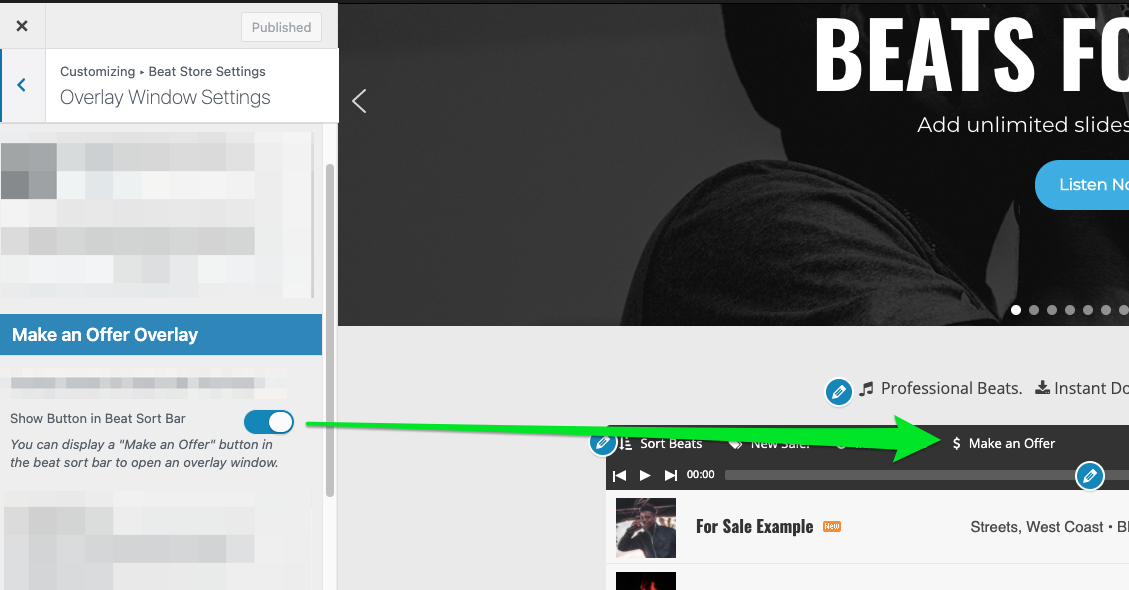
How to Add The Make an Offer Button to Beat Sort Bar
You can also display a “Make an Offer” button in the Beat Sort bar so visitors can make an offer on any of your beats in the Beat Store.
7. Beat Sorting Options Explained
When adding new beats, you have 4 sorting options you can use: Music Genres, Price Range, Beat Beat Tags, and Categories.
- Music Genres – Classify the music genre.
- Examples: Hip-Hop, Dance, R&B, Pop, EDM, classical, Country, Drum & Bass, Breakbeat, Electronica, Experimental, Abstract, Folk, Acoustic, Funk, Groove, House, Jazz, Percussion, Rock, Soul, World.
- Price Range – You can group beats into different price ranges.
- Examples:
- Under $20
- $20 to $50
- $50 to $100
- $100 and Up
- Examples:
- Beat Tags – Add tags that describe elements of the beat. These can be instruments, moods, producer names, beat types, drums, Action, Chill, etc.
- Horns, Hype, Club, Bass Heavy.
- Beat Categories – Group beats by categories.
- Examples: Free Beats, Beats with Hooks, Beat Loops, On Sale, Includes Vocals, Intro, Cinematic, Ambient, Atmospheres, Soundscapes, Corporate, Motivational, Romantic, Dark
Related FAQs
I don’t see the “Beat Store” tab in my WordPress dashboard. What should I do?
If the “Beat Store” tab is missing, it’s likely because the Easy Digital Downloads plugin has not been installed and activated. This plugin is required for the Music Maker theme’s beat store functionality. Follow the steps in the “How to Get Started” article to install and activate it.
How can I protect my untagged beats from unauthorized use before they are purchased?
It is highly recommended that you upload your untagged beats in ZIP files. This can help protect your server. You should also only provide download links to customers who have completed a purchase.
Can I sell exclusive beats and have them automatically removed from the store once sold?
No, this feature is not built into the Music Maker theme. Beats will have to be removed manually.
How do I add my producer tag to the audio preview of my beats?
The Music Maker theme does not have a built-in feature to automatically add producer tags. However, you can use audio editing software like Audacity to manually add your tags to your beat files before uploading them as the audio preview. There is a tutorial available on how to add producer tags to beats quickly using Audacity.
Where can I find more help and troubleshooting tips for the beat store?
You can find a comprehensive list of tutorials and frequently asked questions related to the Beat Store on the Help Website’s Beat Store FAQs page. If you are experiencing specific issues, try searching the Help Website for relevant articles or consult the Troubleshooting section.
Need Help?
1. Try searching for answers. Try searching different terms if you can't find a answer. 2. Try troubleshooting if something is not working.
3. If you can't find answers, click to leave a comment. Provide website links and detailed information.