Follow this tutorial if you get a 500 Error when importing one of the demo styles.
Install Required Plugin
- In WordPress, click Add New under Plugins on the sidebar.
- In the input on the top right, search for Customizer Export/Import.
- Click Install Now, then Activate.

Download Demo Style
- Go to Download Demo Assets
- Click Assets to download the files to the demo you want to install
- Unzip the file
- Look for the .dat file. This will be the file you will upload to your site.
Import Demo Style
- In WordPress, click Customize on the Sidebar
- Click Export/Import at the bottom of the Customizer
- Under Import, click Choose File
- Browse your computer for the folder you unzipped, and find the .dat file.
- Check “Download and import image files”
- Click the Import button.
- Getting an Error?
- Browse your computer for the folder you unzipped, and find the .dat file again.
- DO NO Check “Download and import image files”
- Click the Import button.
- Getting an Error?
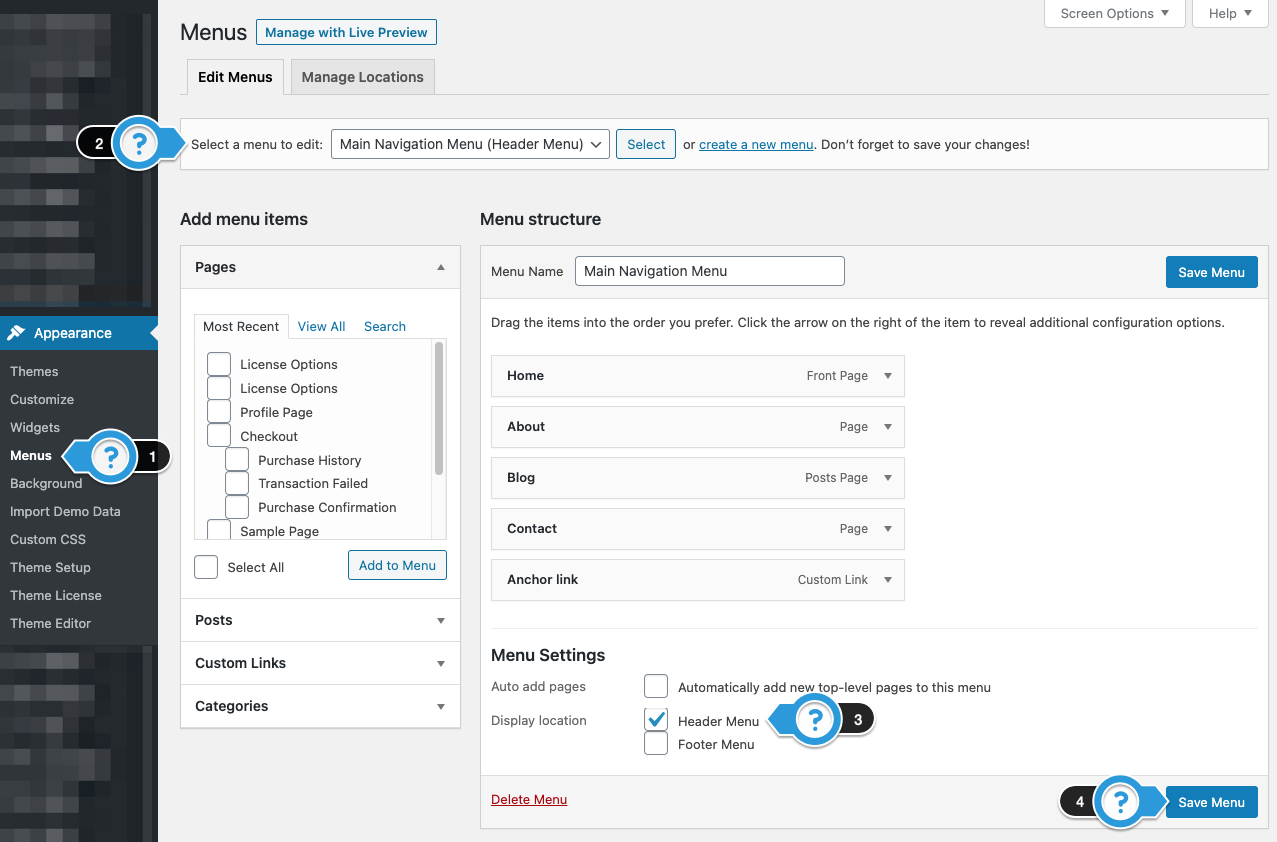
Select The Main Navigation
Sometimes, the navigation menu may need to be updated.
- Click Menus under Appearance on the sidebar.
- Under “Select a menu to edit:” make sure the Main Navigation Menu ( Header Menu ) is selected.
- Under Display location, check the Header Menu.
- Click Save Menu.
Need Help?
1. Try searching for answers. Try searching different terms if you can't find a answer. 2. Try troubleshooting if something is not working.
3. If you can't find answers, click to leave a comment. Provide website links and detailed information.